> ## Documentation Index
> Fetch the complete documentation index at: https://manual.voiceping.net/llms.txt
> Use this file to discover all available pages before exploring further.
# 청구서 관리
> 오너 및 매니저를 위한 멤버 청구서 관리 기능
export const FeedbackKo = () => <>
이 기능에 대한 아이디어나 요청은 Product Feedback을 통해 팀에 보내주세요.
공식 링크
공식 웹사이트 방문
X에서 팔로우
Facebook에서 좋아요
LinkedIn에서 연결
;
## 청구서
VoicePing의 타임 트래킹 기능으로 사용자의 작업 로그가 자동으로 기록되기 때문에 청구서를 쉽게 작성할 수 있습니다.
오너와 매니저는 멤버가 발행한 청구서를 확인할 수 있습니다. 멤버는 자신의 청구서만 보고 관리할 수 있습니다.
### 청구서 접근
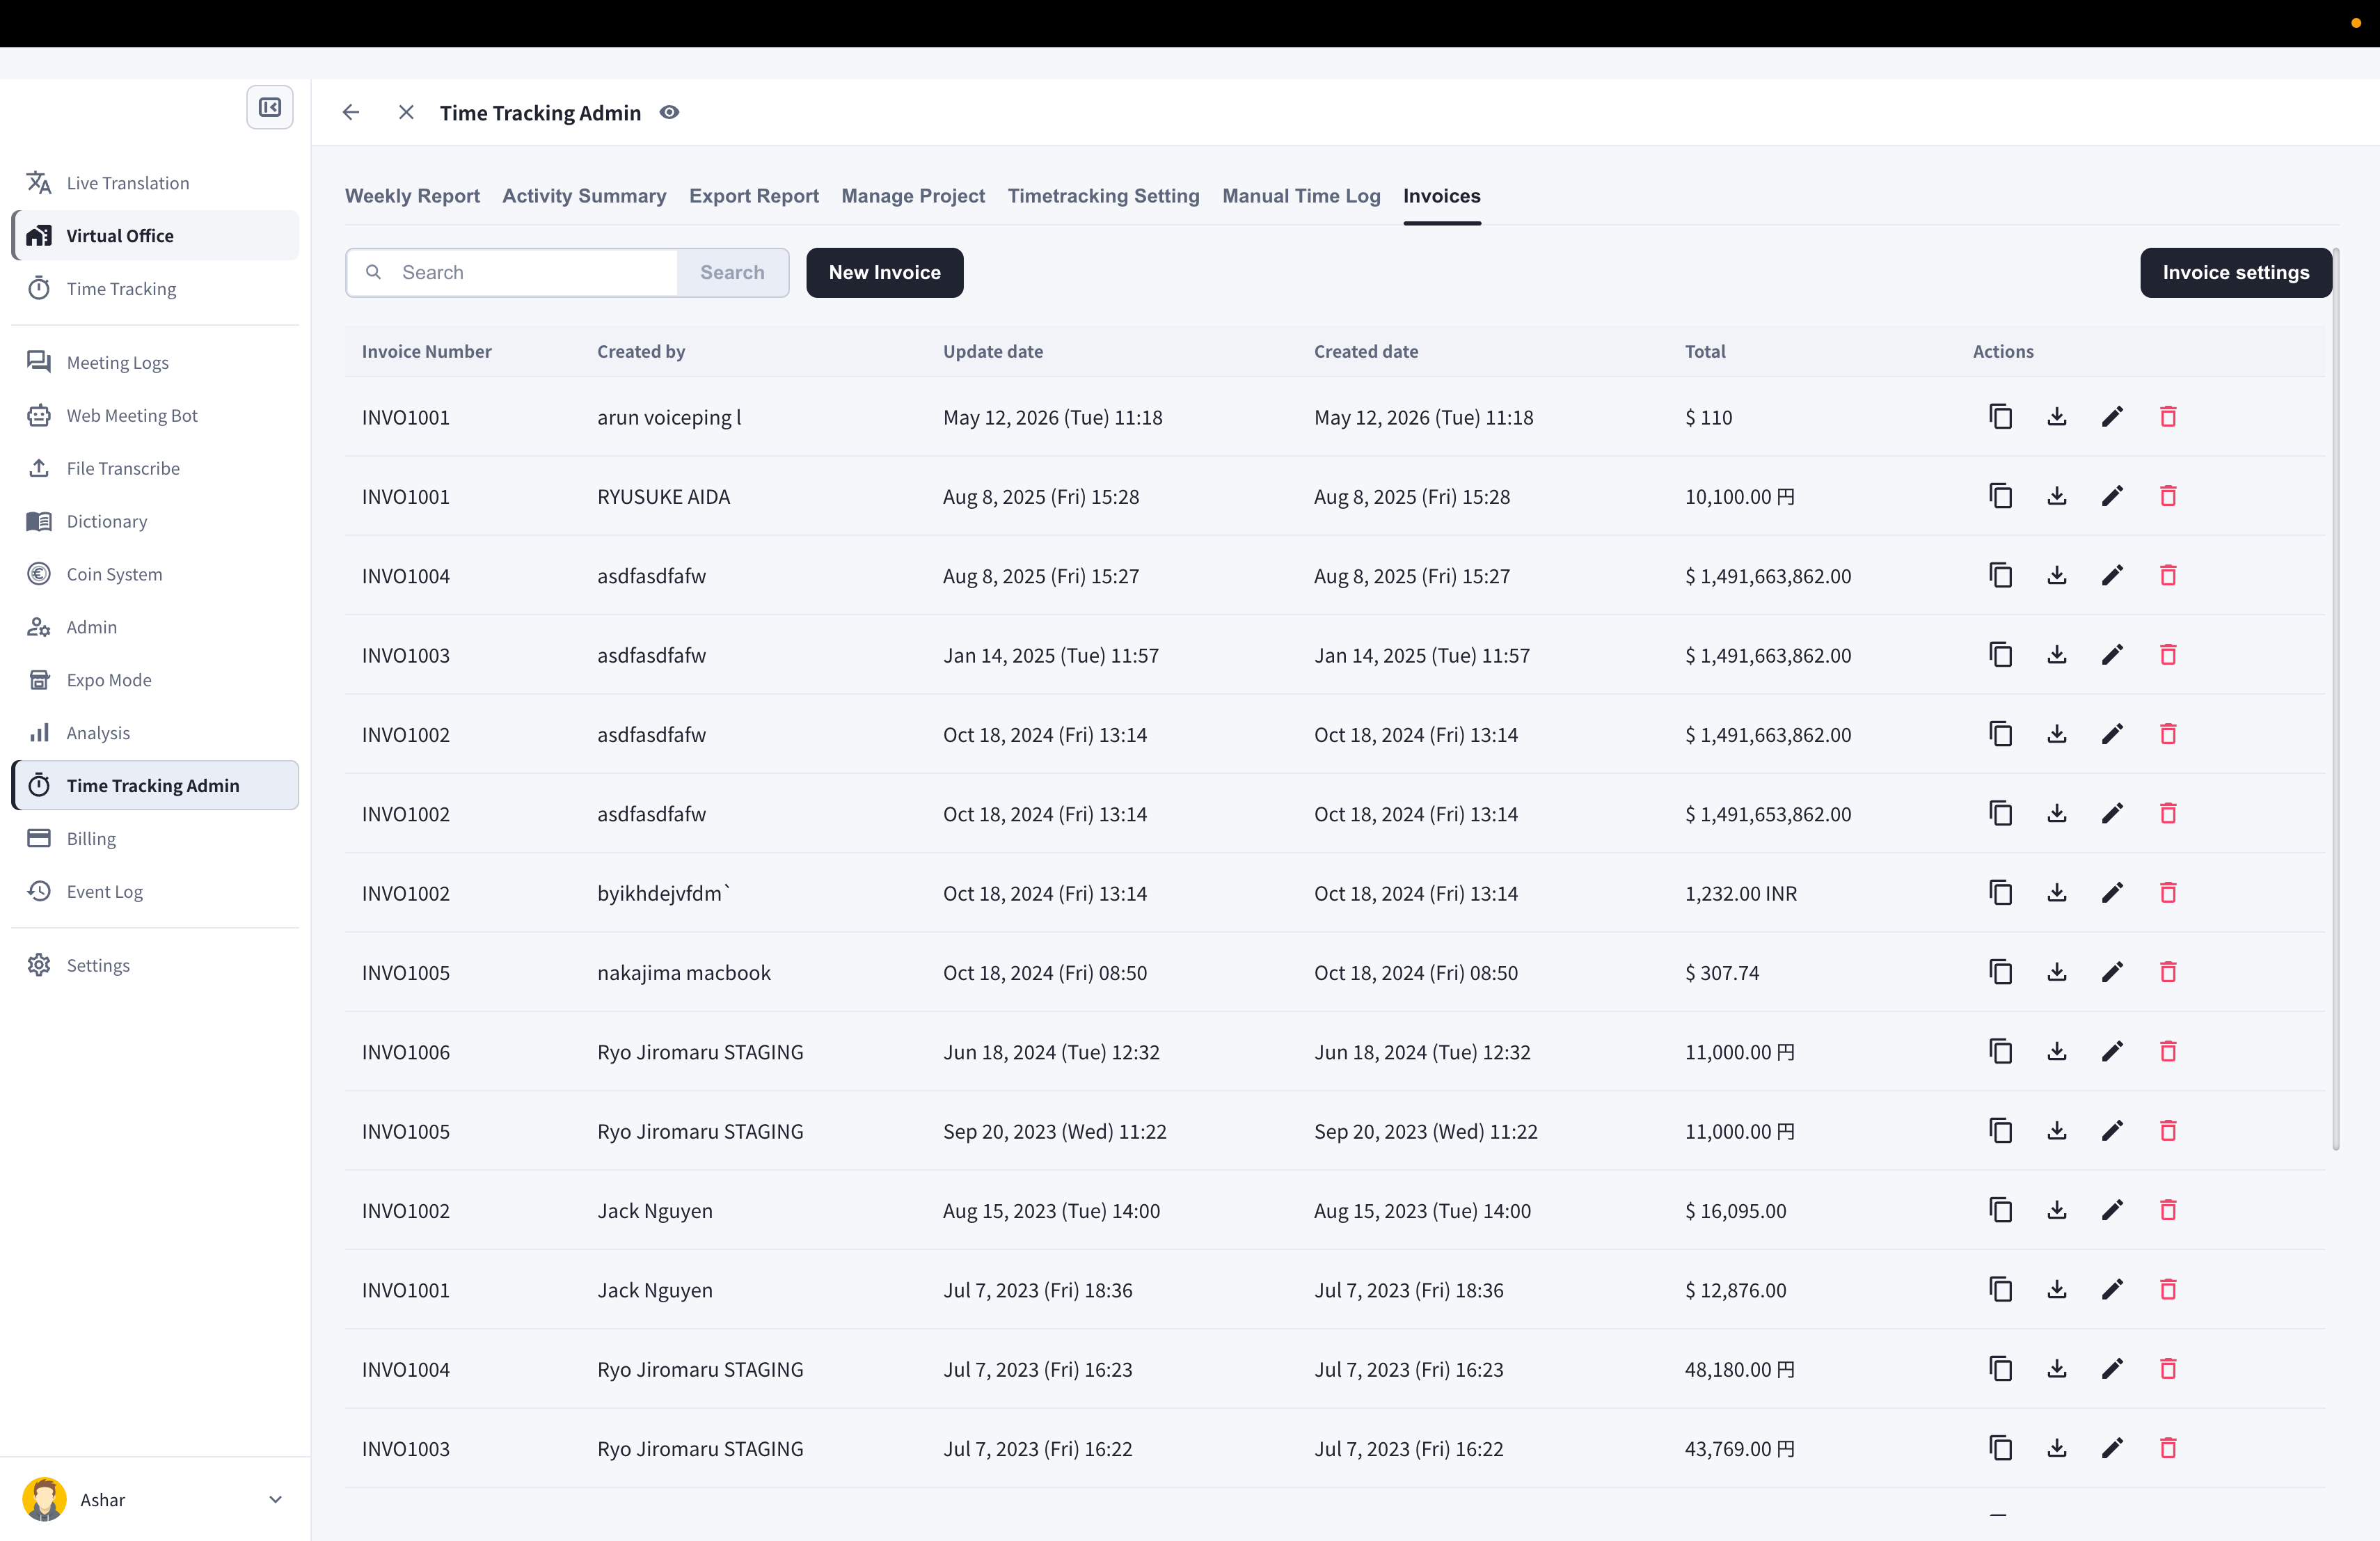
1. 왼쪽 사이드바에서 **시간 추적 관리**를 엽니다
2. **청구서** 탭을 클릭
 ### 청구서 설정
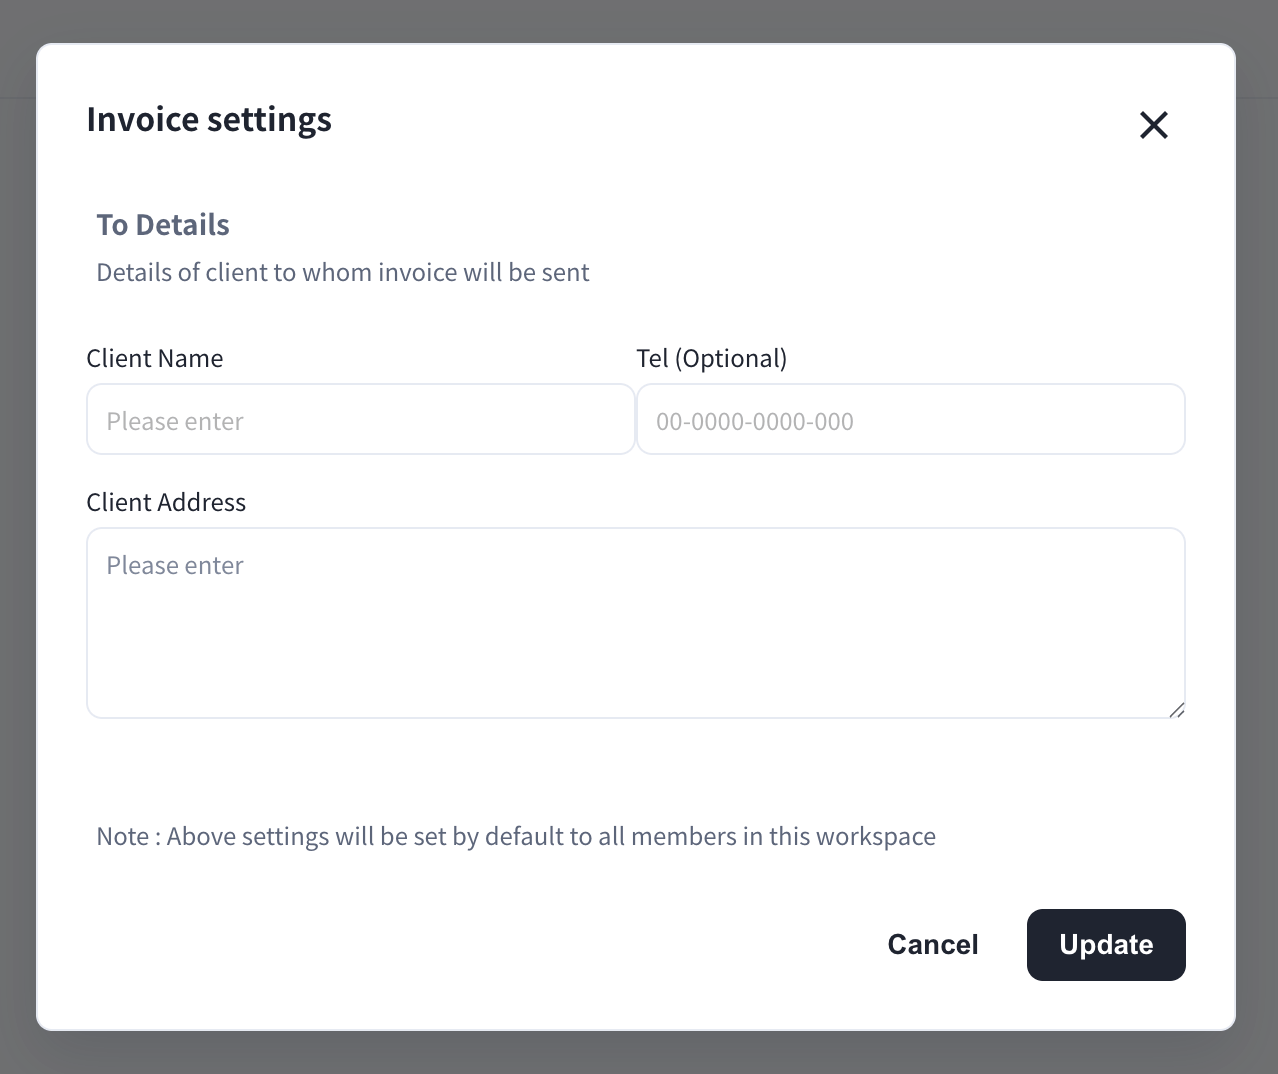
매니저는 **송장 설정** 버튼을 클릭하여 기본 청구처 정보(클라이언트 이름, 전화번호, 주소)를 저장할 수 있습니다. 이 정보는 워크스페이스 내 모든 멤버의 새 청구서에 기본으로 적용됩니다.
### 청구서 설정
매니저는 **송장 설정** 버튼을 클릭하여 기본 청구처 정보(클라이언트 이름, 전화번호, 주소)를 저장할 수 있습니다. 이 정보는 워크스페이스 내 모든 멤버의 새 청구서에 기본으로 적용됩니다.
 ### 청구서 작성
1. **청구서 작성** 버튼을 클릭
2. 청구서 내용을 입력: From/To 정보, 발행일과 지불 기한, 청구서 번호, 통화
3. **시간 추적 로그에서 항목 생성**을 클릭
4. **지난달** 또는 **이달**을 선택하고 **생성**을 클릭 — 작업 로그에서 항목이 생성됩니다
### 청구서 작성
1. **청구서 작성** 버튼을 클릭
2. 청구서 내용을 입력: From/To 정보, 발행일과 지불 기한, 청구서 번호, 통화
3. **시간 추적 로그에서 항목 생성**을 클릭
4. **지난달** 또는 **이달**을 선택하고 **생성**을 클릭 — 작업 로그에서 항목이 생성됩니다
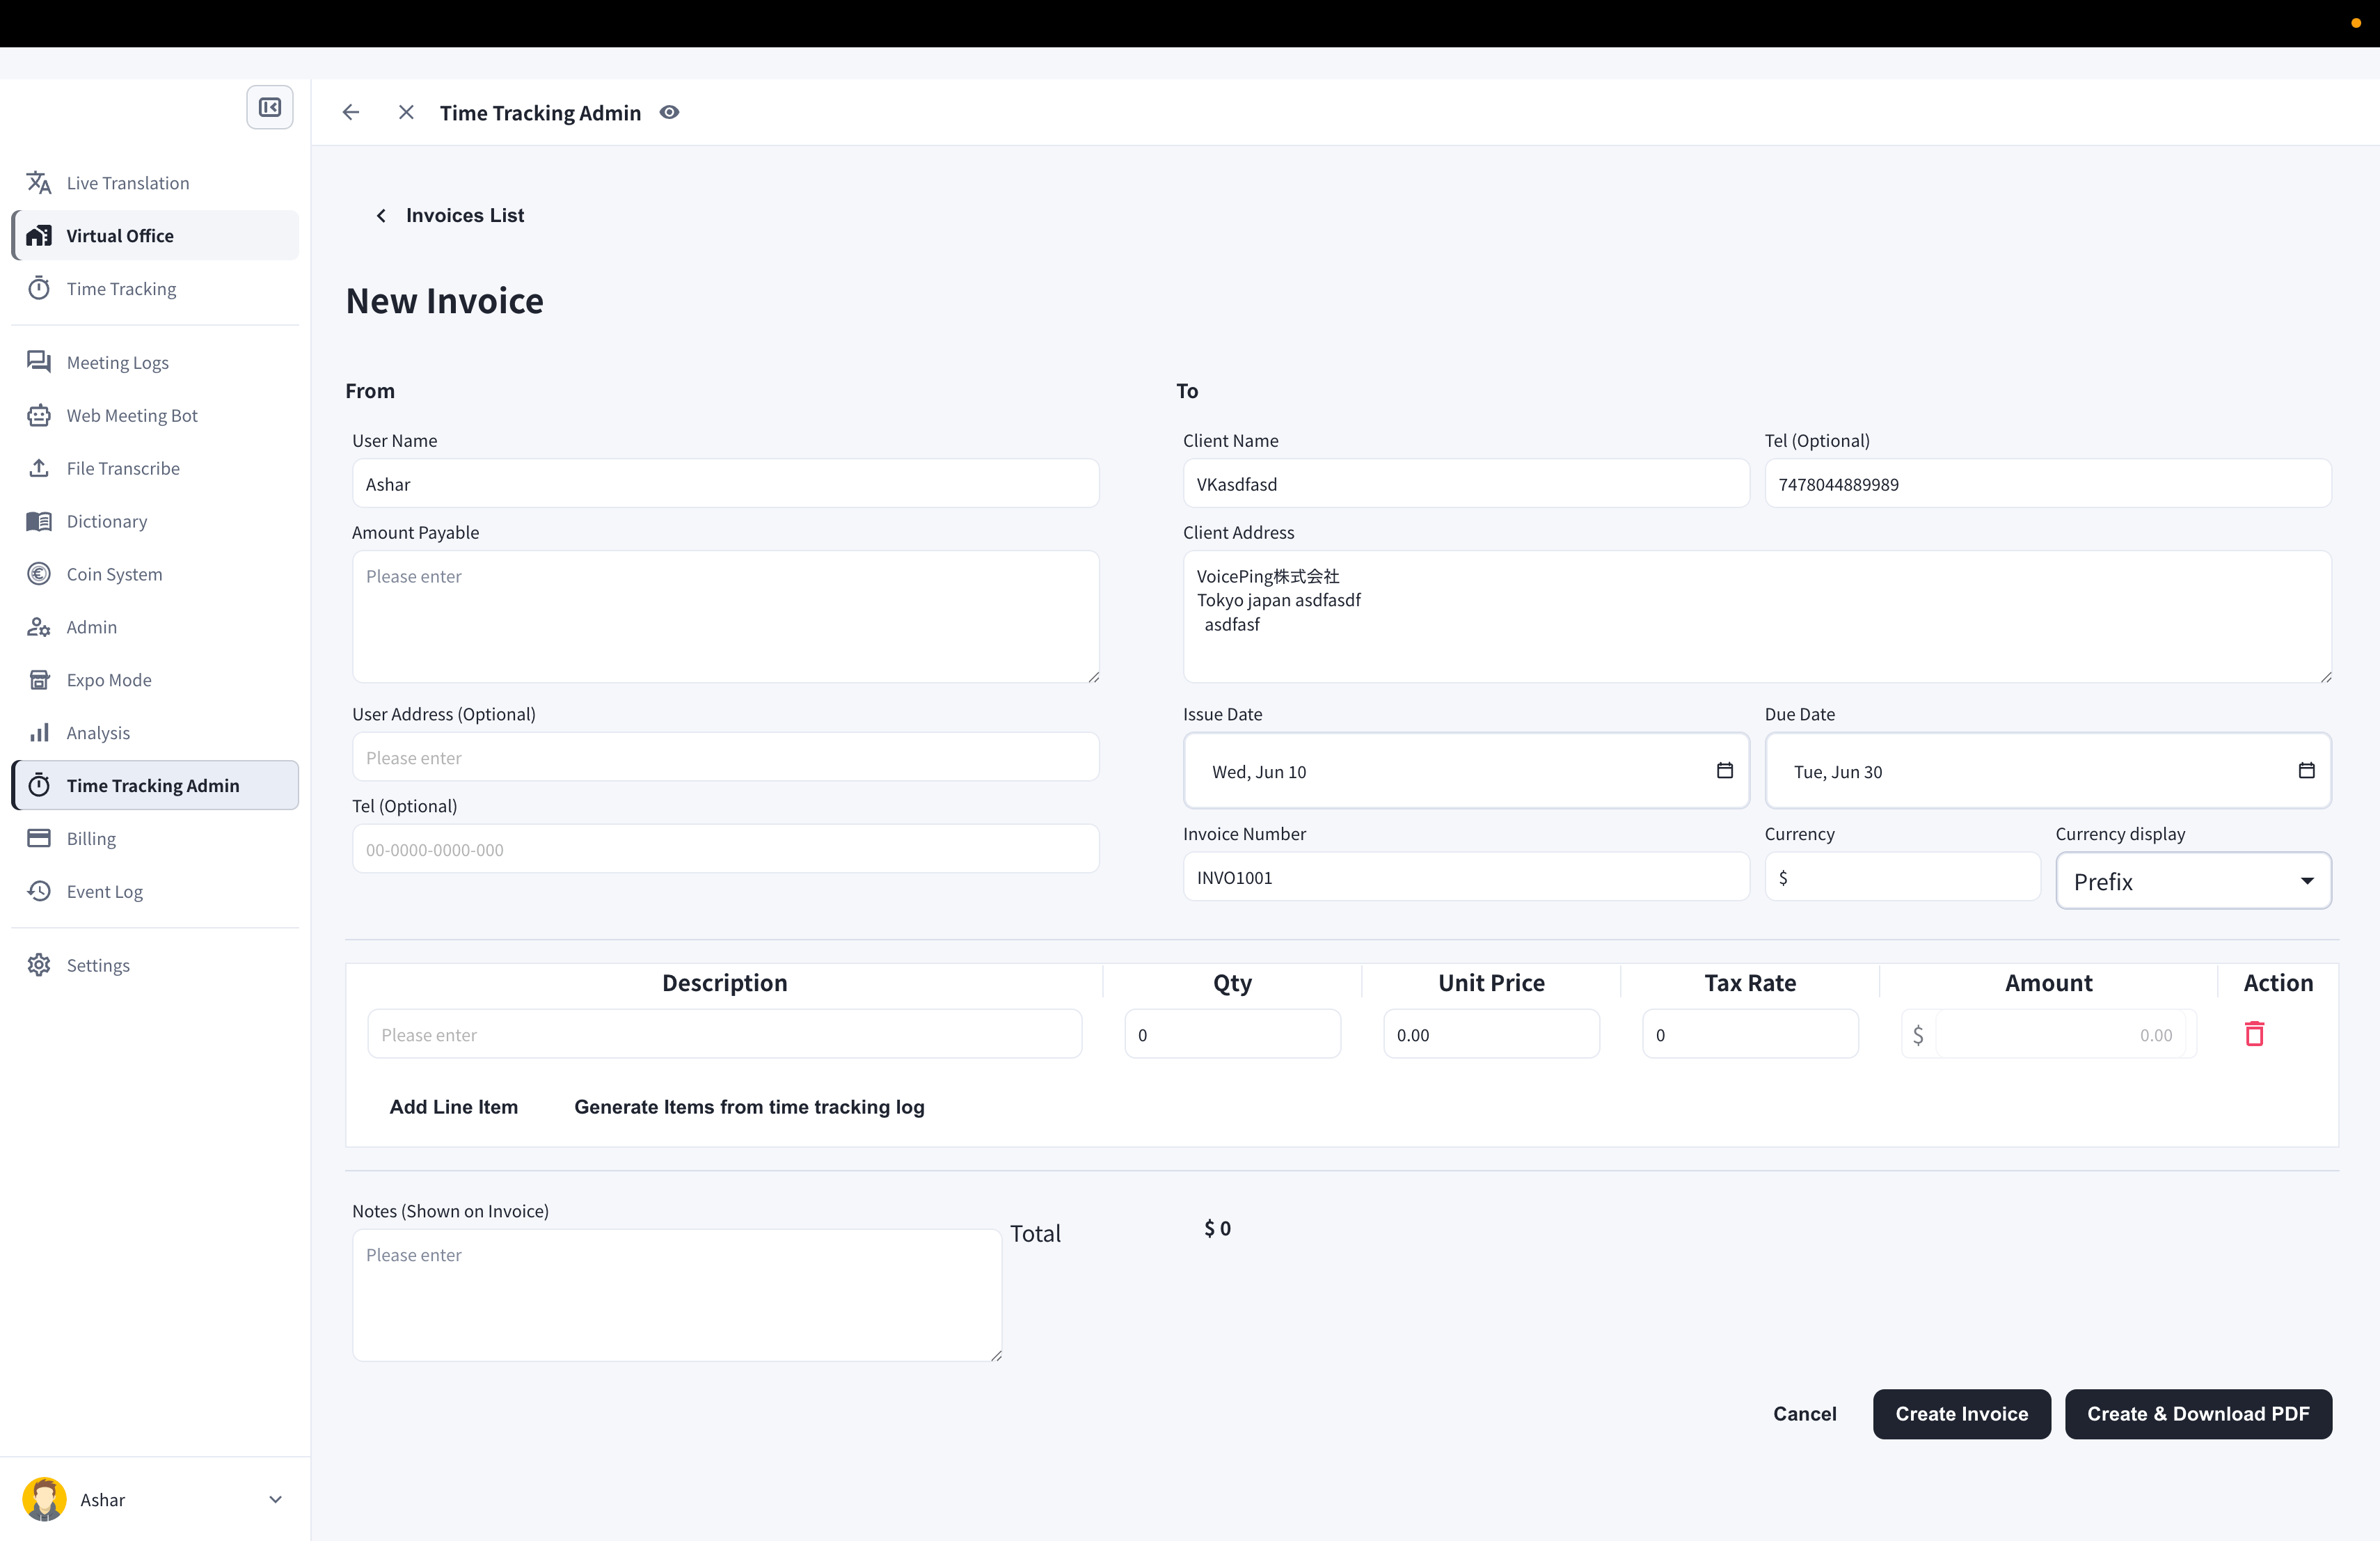 앱에서 기록하지 않은 근무 시간이 있다면 **항목 추가**를 클릭하여 추가할 수 있습니다. 각 항목은 수량, 단가, 세율을 지원합니다.
5. **작성** 또는 **작성하고 PDF 다운로드**를 클릭
### 청구서: 사용자 검색 기능
청구서 목록 위의 검색란을 사용하면 매니저는 청구서를 정리할 때 멤버별로 청구서를 볼 수 있습니다.
### 청구서 복제
1. 복제하려는 청구서의 복사 아이콘을 클릭
### 청구서 다운로드 (PDF)
1. 저장하려는 청구서의 다운로드 아이콘을 클릭
### 청구서 편집
1. 편집하려는 청구서의 펜 아이콘을 클릭
2. 편집 후 **저장** 또는 **저장하고 PDF 다운로드**를 클릭
### 청구서 삭제
1. 삭제하려는 청구서의 휴지통 아이콘을 클릭
2. 확인 대화 상자에서 **청구서 삭제** 버튼을 클릭
앱에서 기록하지 않은 근무 시간이 있다면 **항목 추가**를 클릭하여 추가할 수 있습니다. 각 항목은 수량, 단가, 세율을 지원합니다.
5. **작성** 또는 **작성하고 PDF 다운로드**를 클릭
### 청구서: 사용자 검색 기능
청구서 목록 위의 검색란을 사용하면 매니저는 청구서를 정리할 때 멤버별로 청구서를 볼 수 있습니다.
### 청구서 복제
1. 복제하려는 청구서의 복사 아이콘을 클릭
### 청구서 다운로드 (PDF)
1. 저장하려는 청구서의 다운로드 아이콘을 클릭
### 청구서 편집
1. 편집하려는 청구서의 펜 아이콘을 클릭
2. 편집 후 **저장** 또는 **저장하고 PDF 다운로드**를 클릭
### 청구서 삭제
1. 삭제하려는 청구서의 휴지통 아이콘을 클릭
2. 확인 대화 상자에서 **청구서 삭제** 버튼을 클릭