> ## Documentation Index
> Fetch the complete documentation index at: https://manual.voiceping.net/llms.txt
> Use this file to discover all available pages before exploring further.
# สมัครสมาชิก: สร้าง Workspace ใหม่ (สำหรับเจ้าของ)
> คู่มือนี้อธิบายวิธีที่ผู้ดูแลระบบ (เจ้าของ) สามารถสร้าง Workspace ใหม่และเริ่มใช้งาน VoicePing
export const ContactTh = () => <>
หากคุณมีคำถามใดๆ กรุณาติดต่อเราผ่าน แบบฟอร์มนี้
ลิงก์อย่างเป็นทางการ
เยี่ยมชมเว็บไซต์อย่างเป็นทางการของเรา
ติดตามเราบน X
ติดตามเราบน Facebook
เชื่อมต่อบน LinkedIn
;
คู่มือนี้อธิบายวิธีที่ผู้ดูแลระบบ (เจ้าของ) สามารถสร้าง Workspace ใหม่และเริ่มใช้งาน VoicePing
## PC
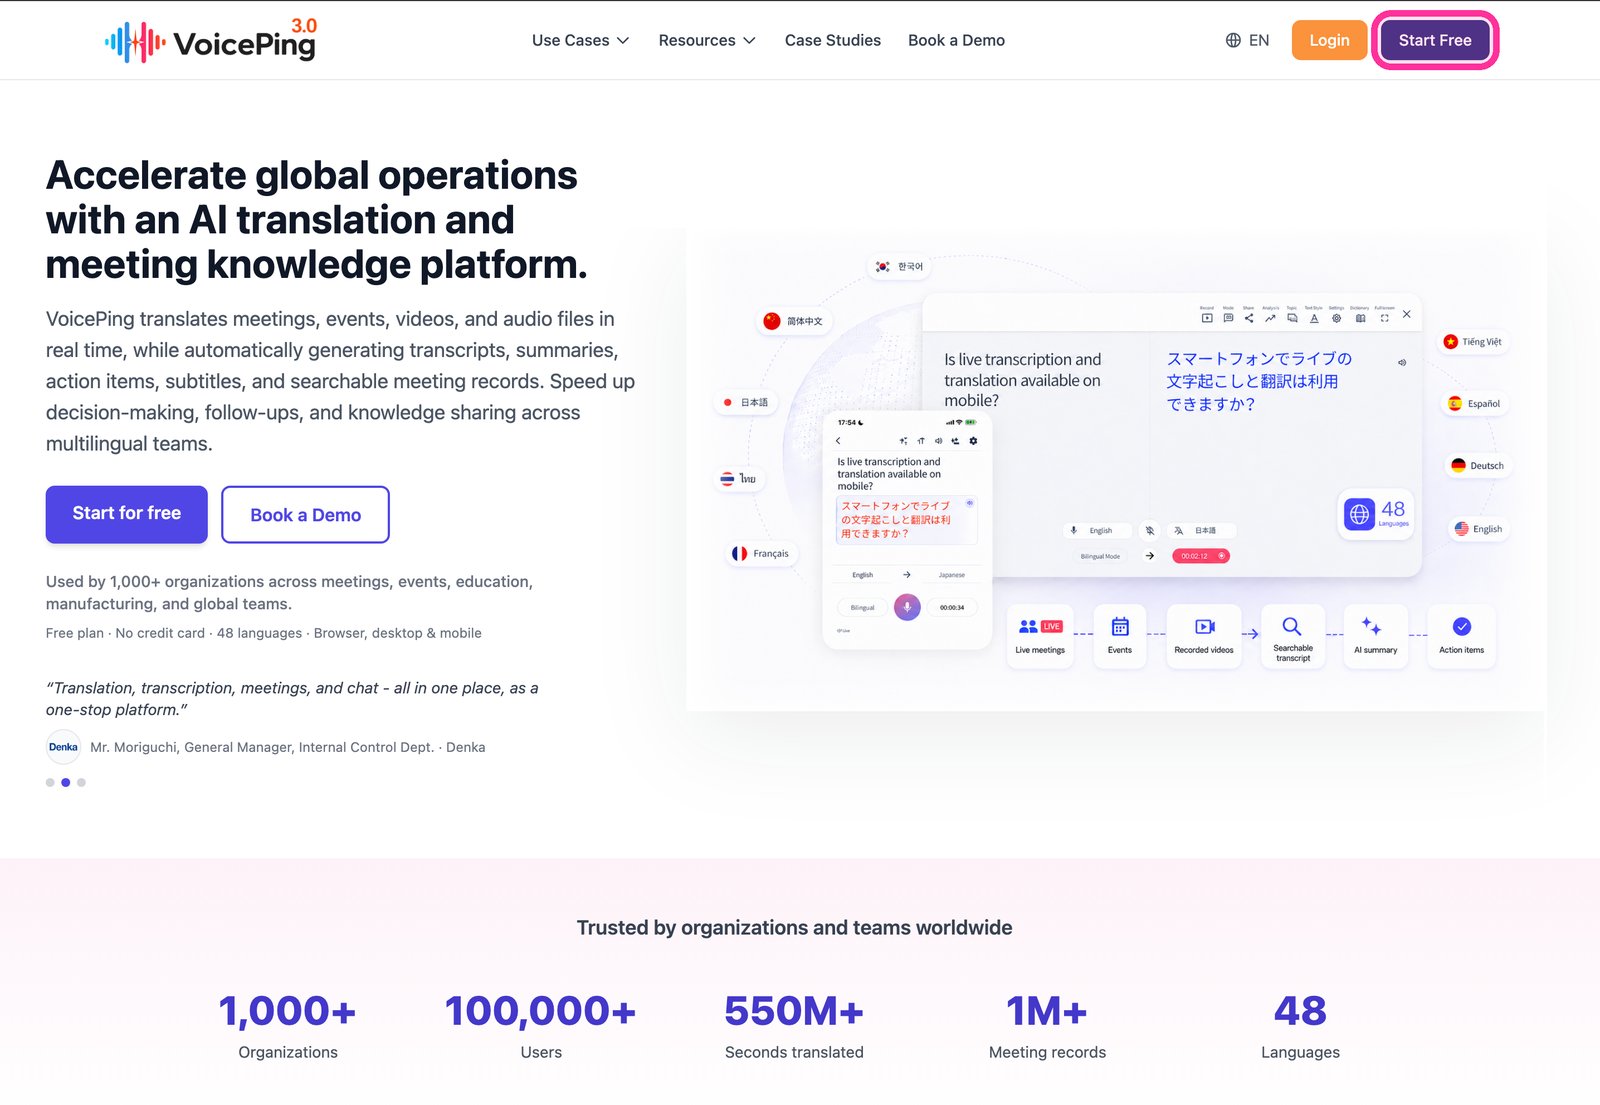
1. **ไปที่[หน้าแรก VoicePing](https://voiceping.net/) และคลิกปุ่ม "Start Free" ที่มุมขวาบน**
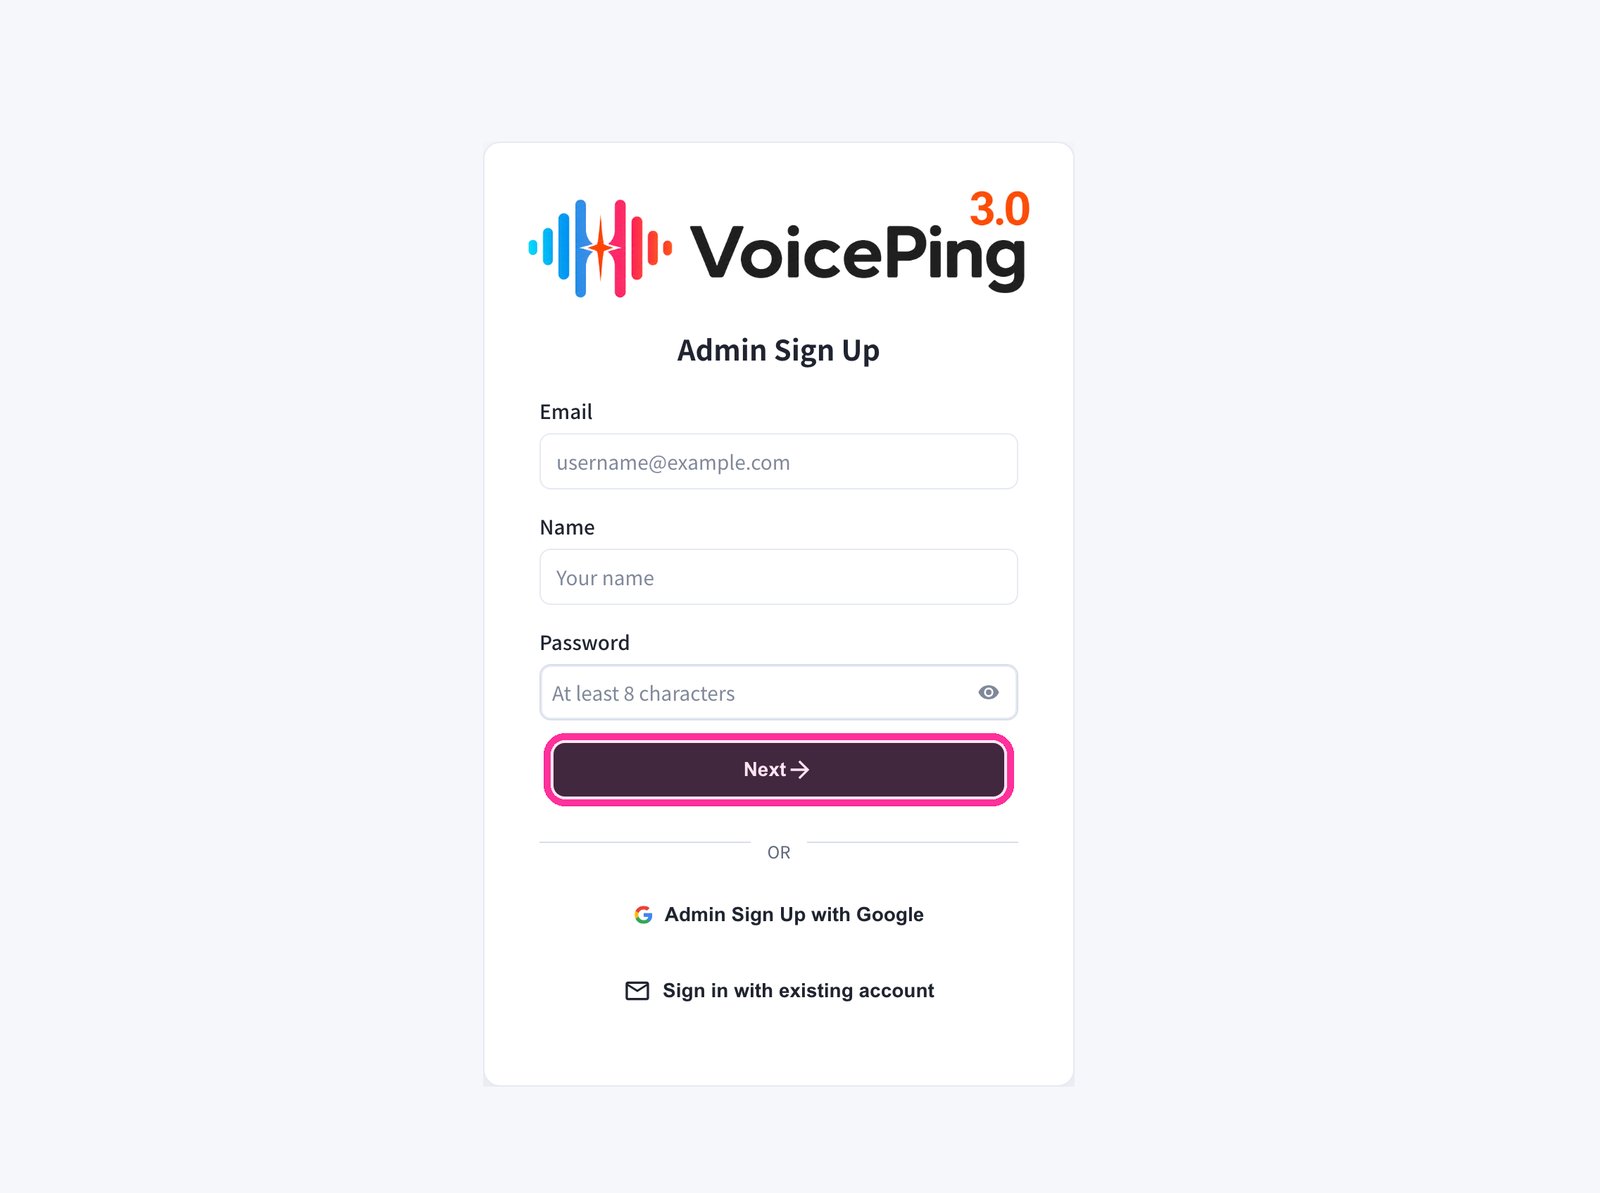
 2. **แบบฟอร์มลงทะเบียนจะปรากฏ กรอกอีเมล ชื่อ และรหัสผ่าน จากนั้นคลิก "Next →"**
* หากต้องการสมัครด้วย Google ให้คลิก "Admin Sign Up with Google"
* หากมีบัญชีอยู่แล้ว ให้คลิก "Sign in with existing account"
2. **แบบฟอร์มลงทะเบียนจะปรากฏ กรอกอีเมล ชื่อ และรหัสผ่าน จากนั้นคลิก "Next →"**
* หากต้องการสมัครด้วย Google ให้คลิก "Admin Sign Up with Google"
* หากมีบัญชีอยู่แล้ว ให้คลิก "Sign in with existing account"
 3. **กรอกรหัสยืนยันที่ส่งไปยังอีเมลของคุณ**
4. **ทำตามคำแนะนำบนหน้าจอเพื่อตั้งค่า Workspace**
## มือถือ / แท็บเล็ต
### สมัครด้วยอีเมล
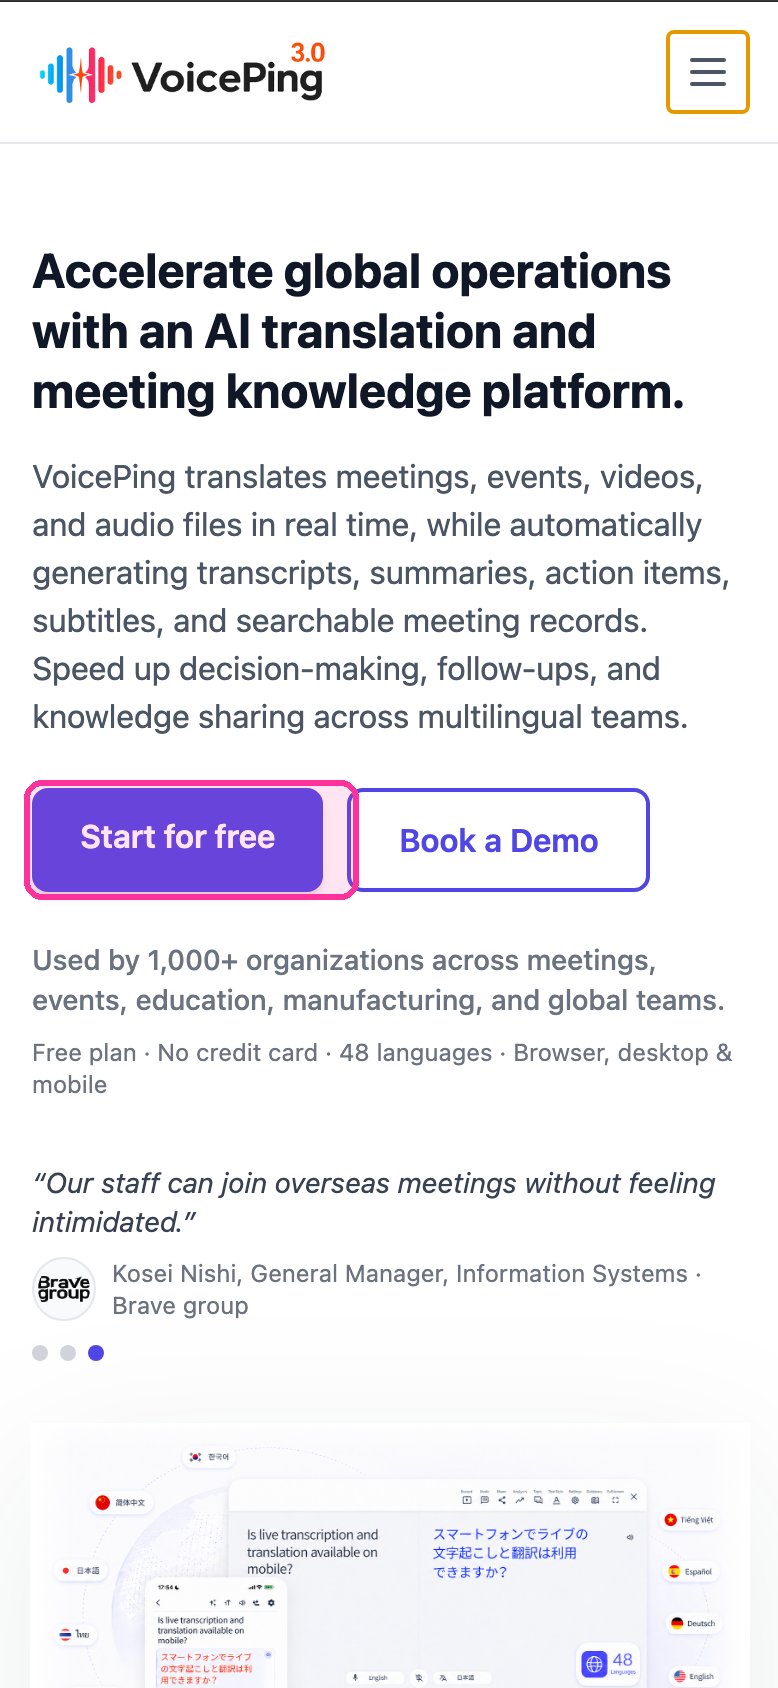
1. **ไปที่[หน้าแรก VoicePing](https://voiceping.net/) แล้วแตะปุ่ม "Start for free"**
3. **กรอกรหัสยืนยันที่ส่งไปยังอีเมลของคุณ**
4. **ทำตามคำแนะนำบนหน้าจอเพื่อตั้งค่า Workspace**
## มือถือ / แท็บเล็ต
### สมัครด้วยอีเมล
1. **ไปที่[หน้าแรก VoicePing](https://voiceping.net/) แล้วแตะปุ่ม "Start for free"**
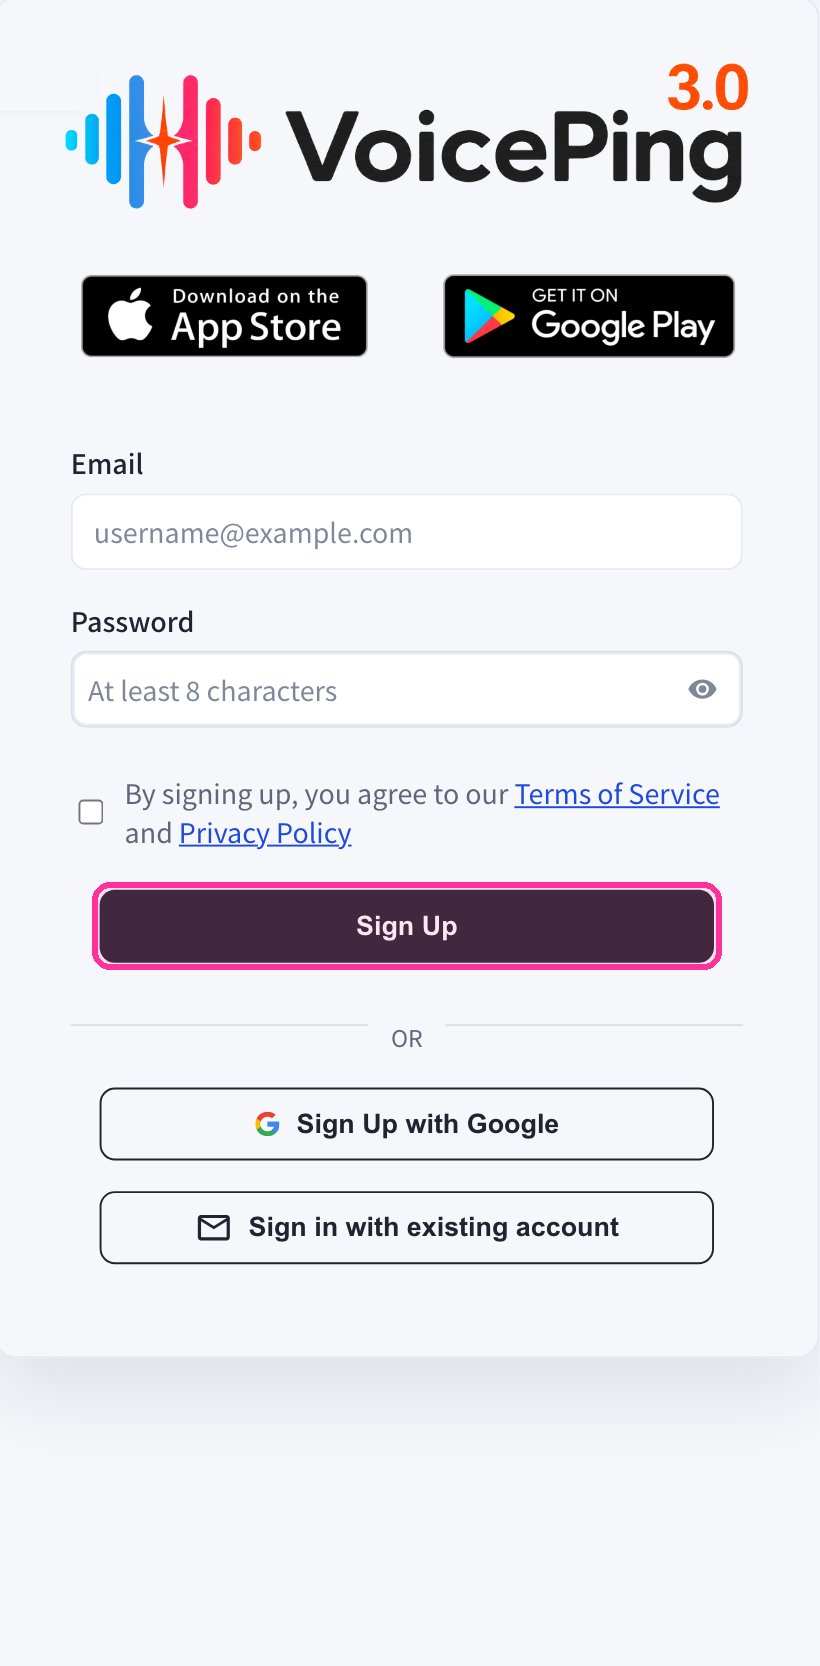
 2. **แบบฟอร์มลงทะเบียนจะปรากฏบนเว็บแอปมือถือ กรอกอีเมลและรหัสผ่าน ยอมรับข้อกำหนดในการให้บริการ จากนั้นแตะ "Sign Up"**
 3. **กรอกรหัสยืนยันที่ส่งไปยังอีเมลของคุณ**
4. **ทำตามคำแนะนำบนหน้าจอเพื่อตั้งค่า Workspace**
5. **ดาวน์โหลดแอป VoicePing จาก [App Store](https://apps.apple.com/jp/app/voiceping-2-0/id6450720360) หรือ [Google Play](https://play.google.com/store/apps/details?id=com.voiceping.app) และเข้าสู่ระบบด้วยบัญชีที่สร้างไว้**
### สมัครด้วยบัญชี Google หรือ Apple
หากมีบัญชี Google หรือ Apple สามารถสร้างบัญชีและเข้าสู่ระบบได้โดยตรงจากแอปมือถือ
1. **ดาวน์โหลดแอป VoicePing จาก [App Store](https://apps.apple.com/jp/app/voiceping-2-0/id6450720360) หรือ [Google Play](https://play.google.com/store/apps/details?id=com.voiceping.app)**
2. **เปิดแอปและสมัครสมาชิกด้วยบัญชี Google หรือ Apple**
หากการดาวน์โหลดแอป PC ไม่เริ่มโดยอัตโนมัติ สามารถดาวน์โหลดได้โดยตรงจากหน้า[ดาวน์โหลดแอป PC](/th/pc-download)
3. **กรอกรหัสยืนยันที่ส่งไปยังอีเมลของคุณ**
4. **ทำตามคำแนะนำบนหน้าจอเพื่อตั้งค่า Workspace**
5. **ดาวน์โหลดแอป VoicePing จาก [App Store](https://apps.apple.com/jp/app/voiceping-2-0/id6450720360) หรือ [Google Play](https://play.google.com/store/apps/details?id=com.voiceping.app) และเข้าสู่ระบบด้วยบัญชีที่สร้างไว้**
### สมัครด้วยบัญชี Google หรือ Apple
หากมีบัญชี Google หรือ Apple สามารถสร้างบัญชีและเข้าสู่ระบบได้โดยตรงจากแอปมือถือ
1. **ดาวน์โหลดแอป VoicePing จาก [App Store](https://apps.apple.com/jp/app/voiceping-2-0/id6450720360) หรือ [Google Play](https://play.google.com/store/apps/details?id=com.voiceping.app)**
2. **เปิดแอปและสมัครสมาชิกด้วยบัญชี Google หรือ Apple**
หากการดาวน์โหลดแอป PC ไม่เริ่มโดยอัตโนมัติ สามารถดาวน์โหลดได้โดยตรงจากหน้า[ดาวน์โหลดแอป PC](/th/pc-download)