> ## Documentation Index
> Fetch the complete documentation index at: https://manual.voiceping.net/llms.txt
> Use this file to discover all available pages before exploring further.
# 邀請成員和兩步驗證
> 如何透過電子郵件或可分享的連結邀請成員加入您的 VoicePing 工作區、設定其角色與功能存取權限,並要求使用電子郵件進行的兩步驗證。
export const ContactZhTW = () => <>
如有任何問題,請透過此表單與我們聯繫。
## 官方連結
造訪官方網站
在X上追蹤我們
在Facebook上按讚
在LinkedIn上連結
;
* 只有**工作區擁有者和管理員**可以邀請成員。
* 註冊完成後,受邀成員應按照[會員註冊](/zh-tw/member-signup)的步驟安裝應用程式。
## 新增成員
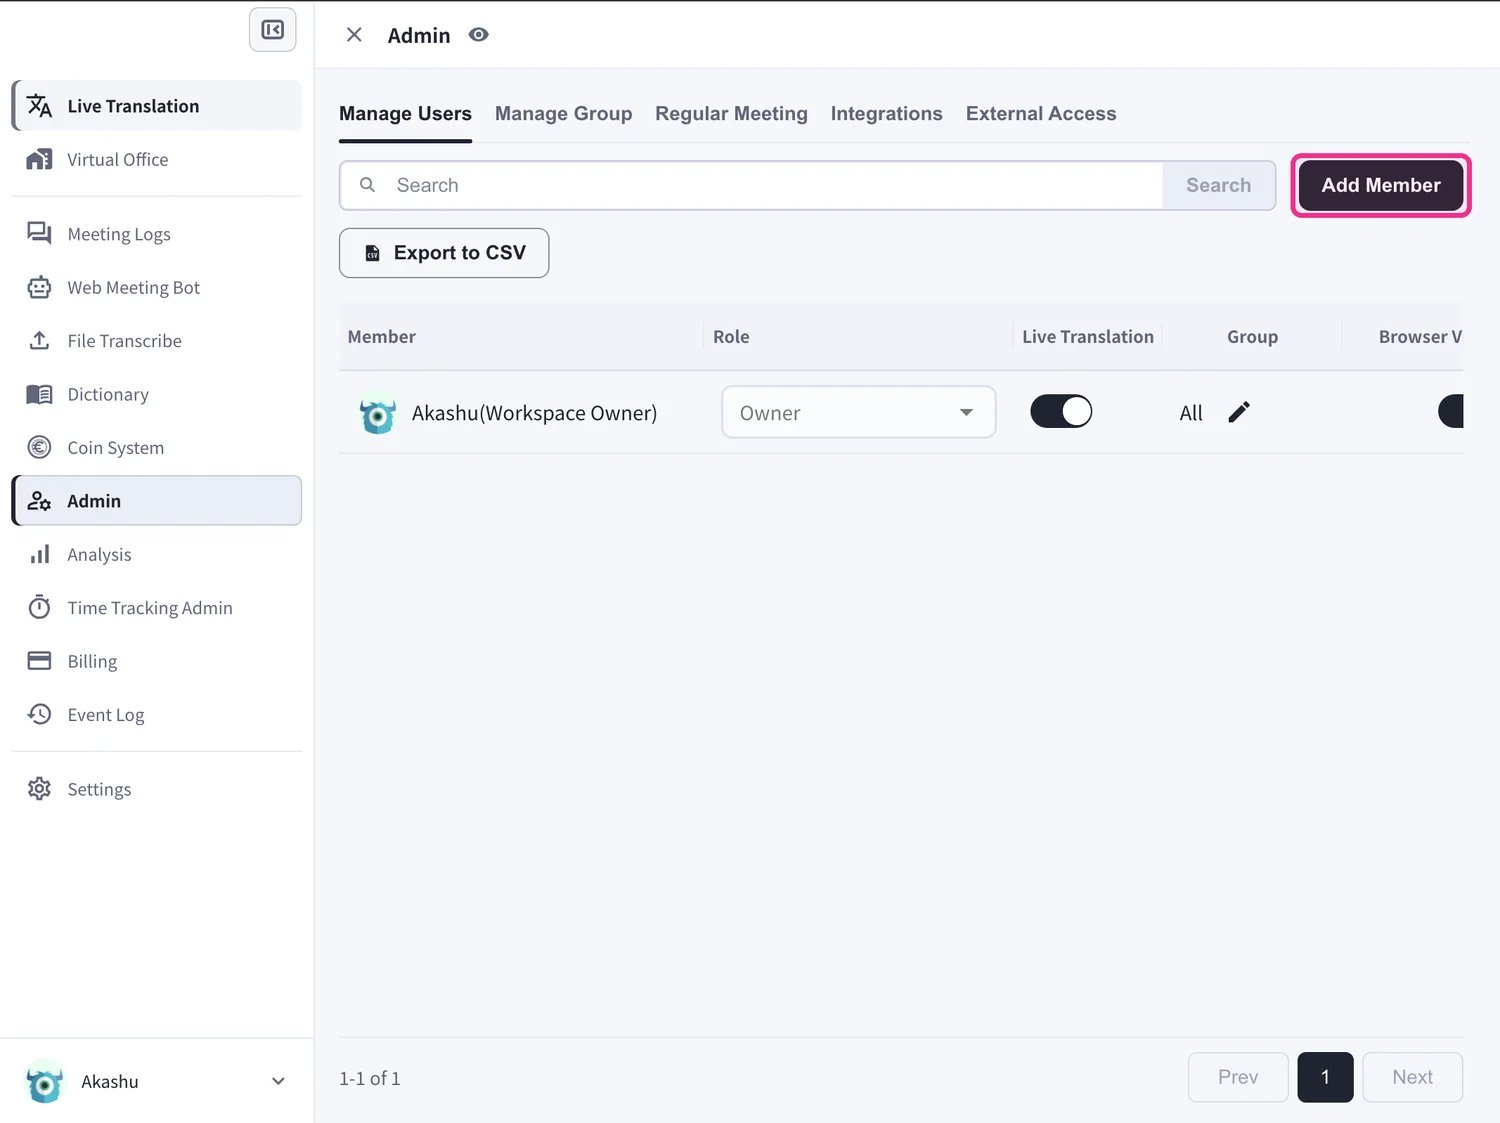
前往 **Admin → Manage Users** 並點選 **Add Member**。所有邀請方式都集中在同一個對話框中,共有三個分頁——**Invite to workspace**(透過電子郵件)、**Manage invites**(追蹤待處理的邀請)以及 **Invite by URL**(可分享的連結)。虛擬辦公室不再有獨立的邀請流程。
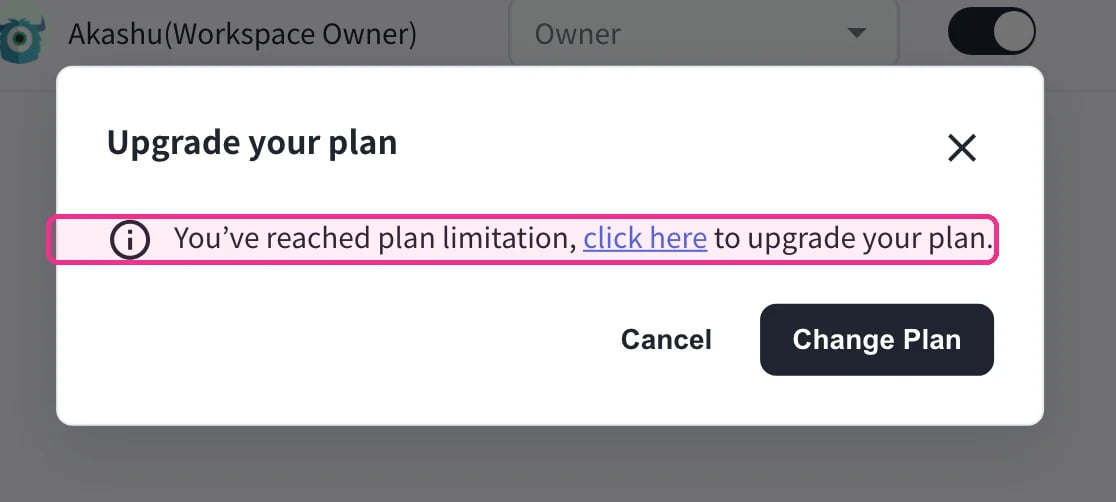
 **Free** 和 **Individual** 方案僅限單一工作區使用者,因此 **Add Member** 會顯示「Upgrade your plan」訊息。升級至 Small、Premium 或 Enterprise 方案即可邀請更多成員。
 ## 邀請到工作區(透過電子郵件)
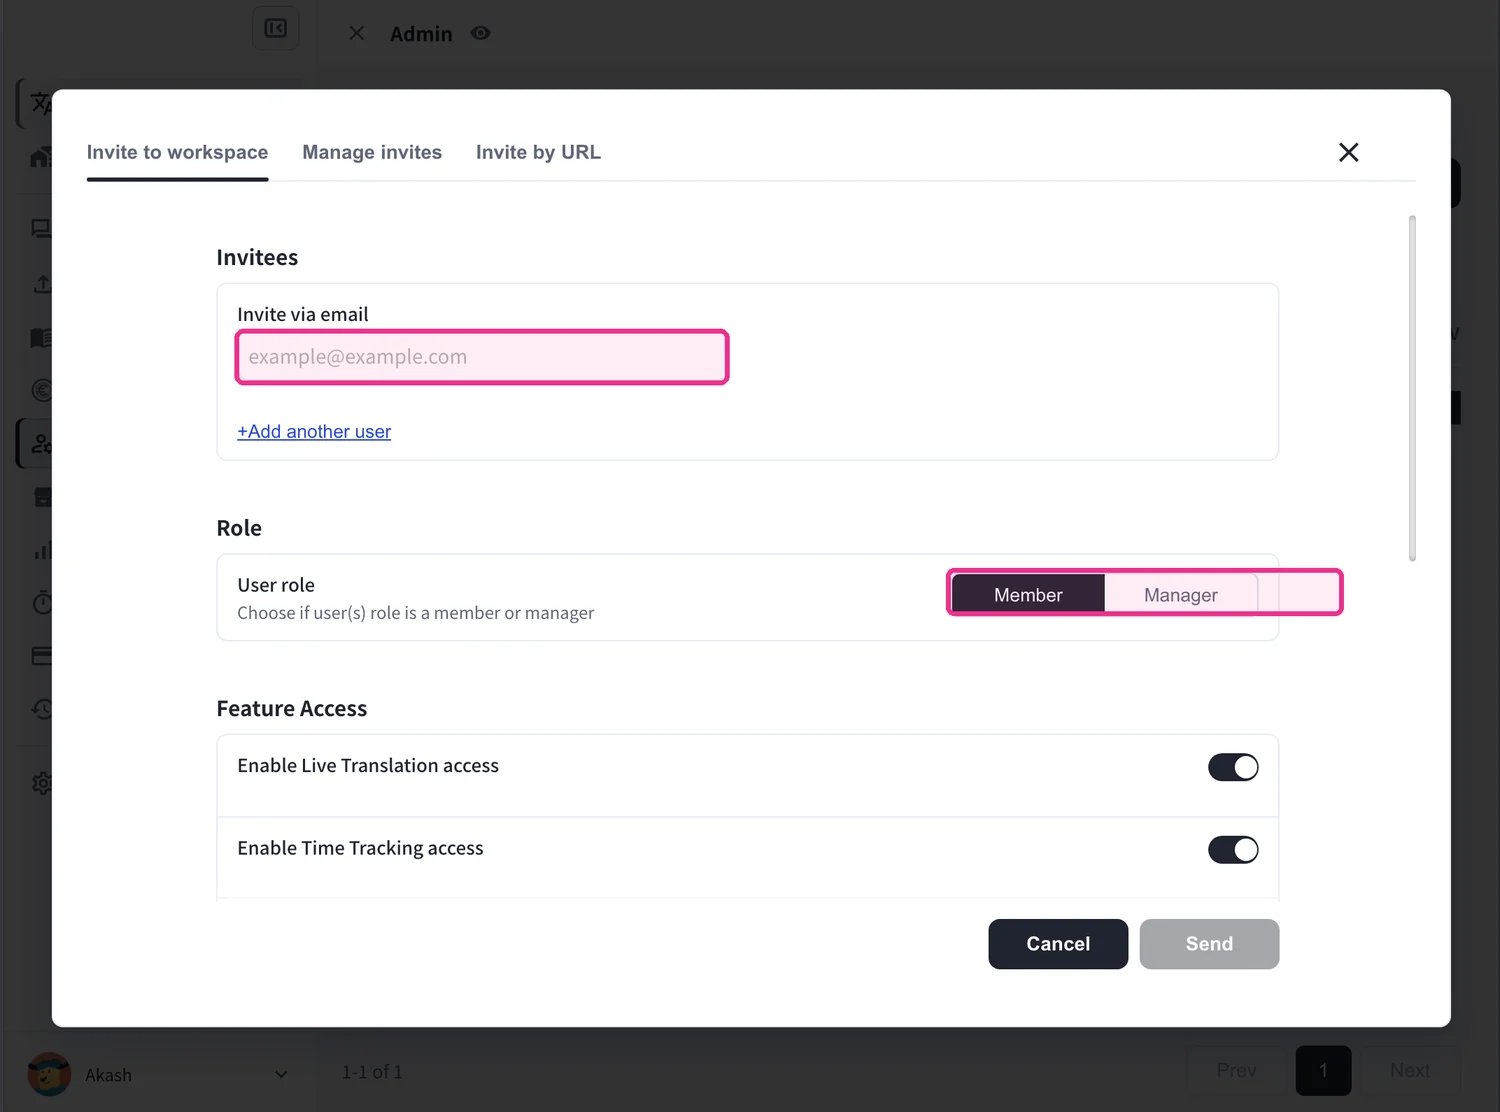
當您想透過電子郵件邀請成員並同時設定其角色與存取權限時使用此方式。
1. 在 **Invite via email** 下方,輸入成員的電子郵件地址(使用 **+Add another user** 可一次邀請多位)。
2. 設定 **User role**——**Member** 或 **Manager**。
## 邀請到工作區(透過電子郵件)
當您想透過電子郵件邀請成員並同時設定其角色與存取權限時使用此方式。
1. 在 **Invite via email** 下方,輸入成員的電子郵件地址(使用 **+Add another user** 可一次邀請多位)。
2. 設定 **User role**——**Member** 或 **Manager**。
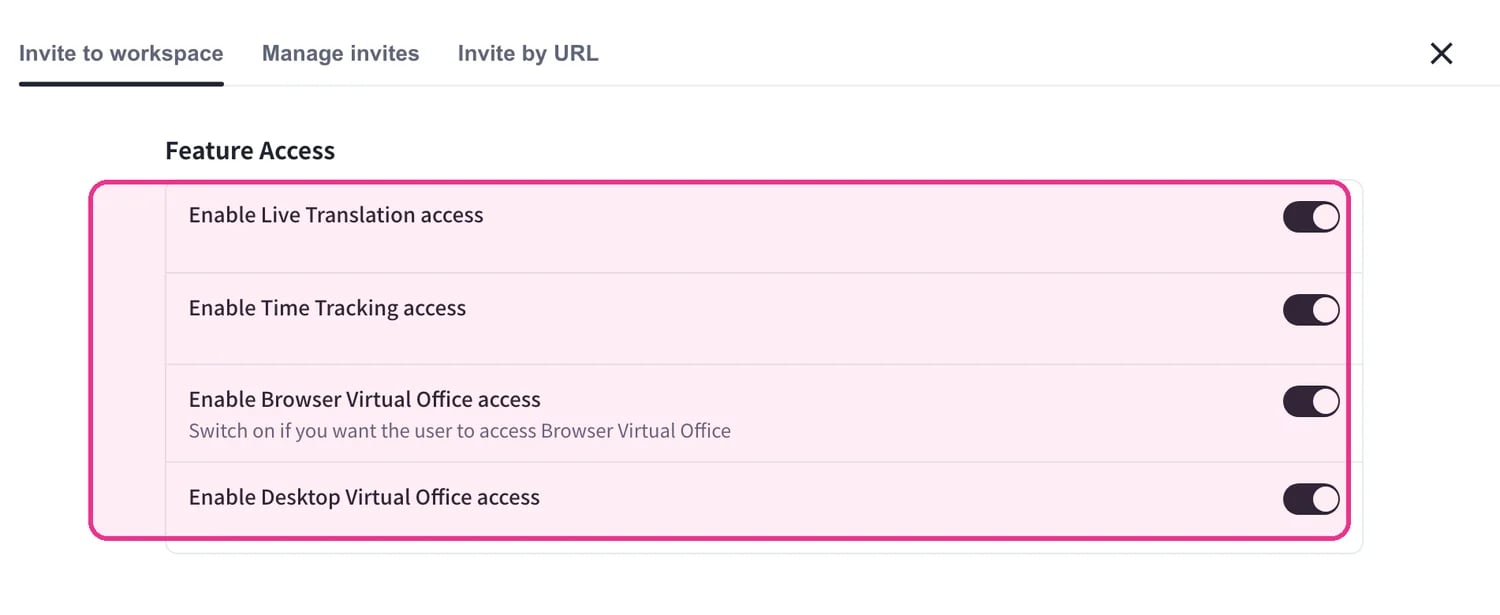
 3. 在 **Feature Access** 下方,選擇成員可以使用哪些功能:**Live Translation**、**Time Tracking** 以及 **Browser** / **Desktop Virtual Office**。虛擬辦公室的存取權限就在這裡授予——這就是為什麼不需要獨立的虛擬辦公室邀請區塊。
 4. 您可以選擇性地將成員指派到 **Projects**、**Groups** 和特定的 **Floors**,並在啟用 Time Tracking 時設定 **Tracking Options**(螢幕截圖擷取、網路攝影機拍攝、輸入活動)。
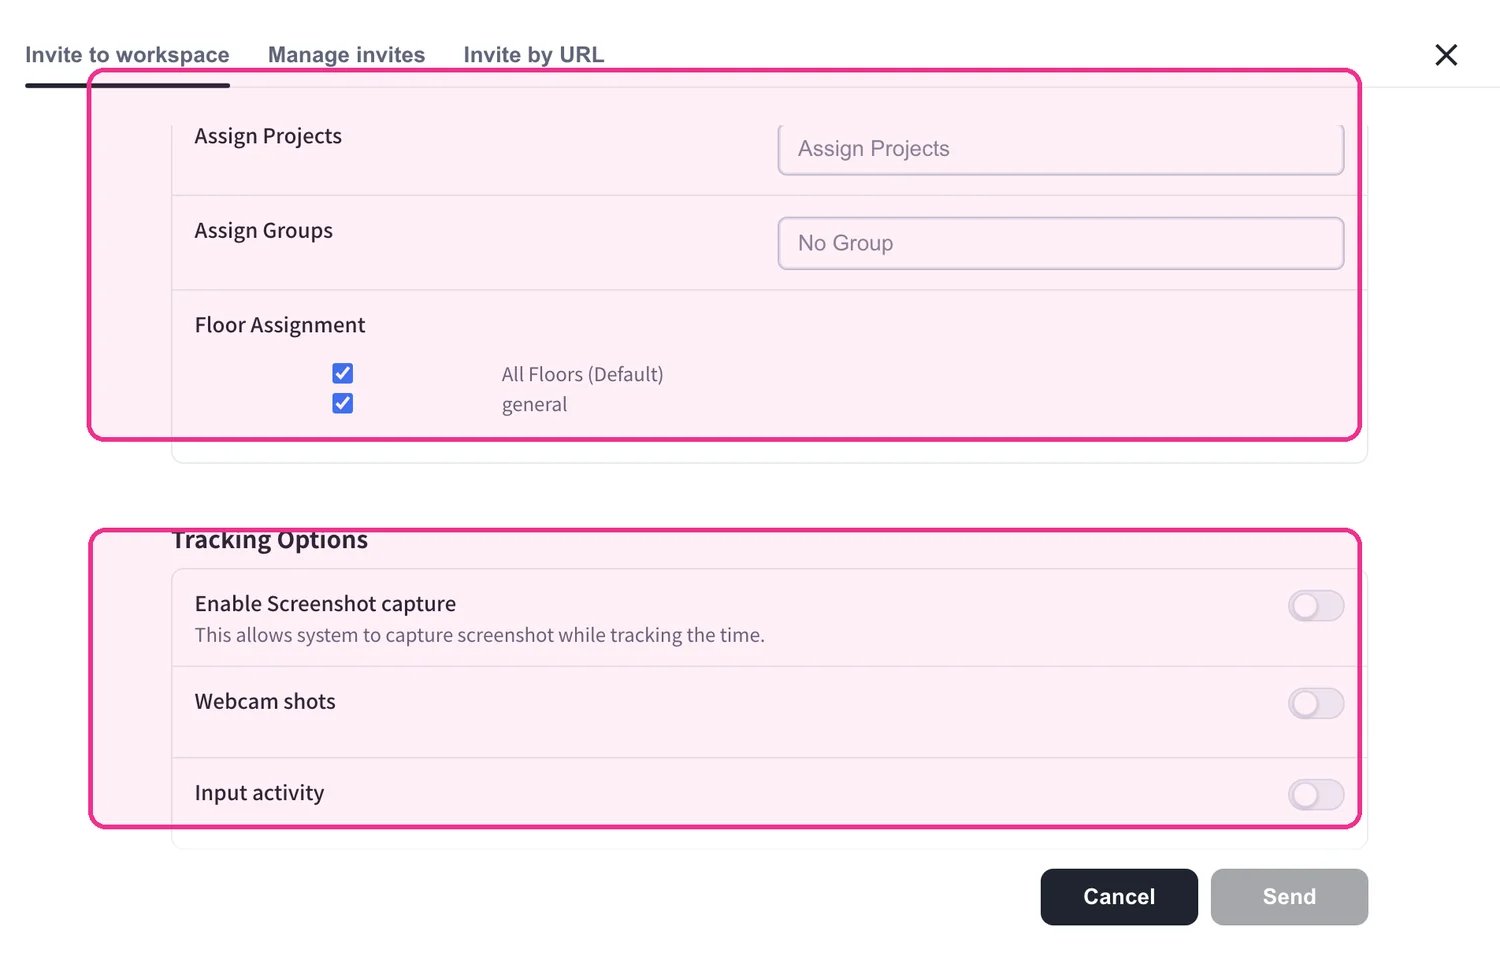 5. 點選 **Send**。成員會收到一封邀請電子郵件,並點選 **Join workspace** 進行註冊。
 電子郵件邀請連結的有效期限為 **72 小時**。
## 透過 URL 邀請
當您想分享單一邀請連結,而不是逐一輸入電子郵件地址時使用此方式。
1. 在 **Invite by URL** 分頁上,選擇連結的有效期限(**1、3、7 或 30 天**)。
電子郵件邀請連結的有效期限為 **72 小時**。
## 透過 URL 邀請
當您想分享單一邀請連結,而不是逐一輸入電子郵件地址時使用此方式。
1. 在 **Invite by URL** 分頁上,選擇連結的有效期限(**1、3、7 或 30 天**)。
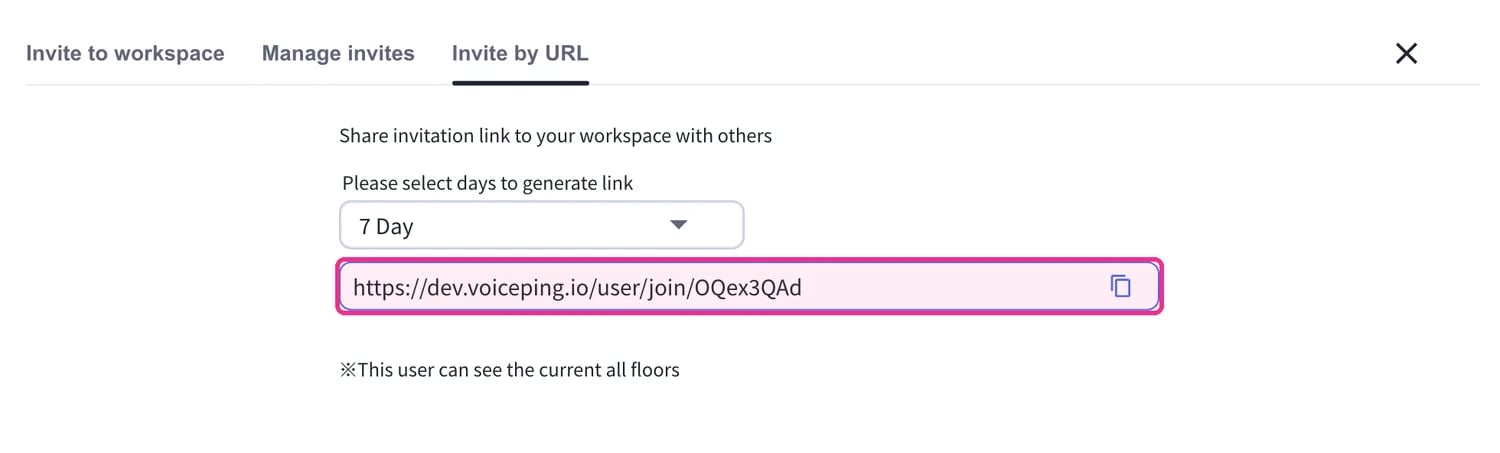
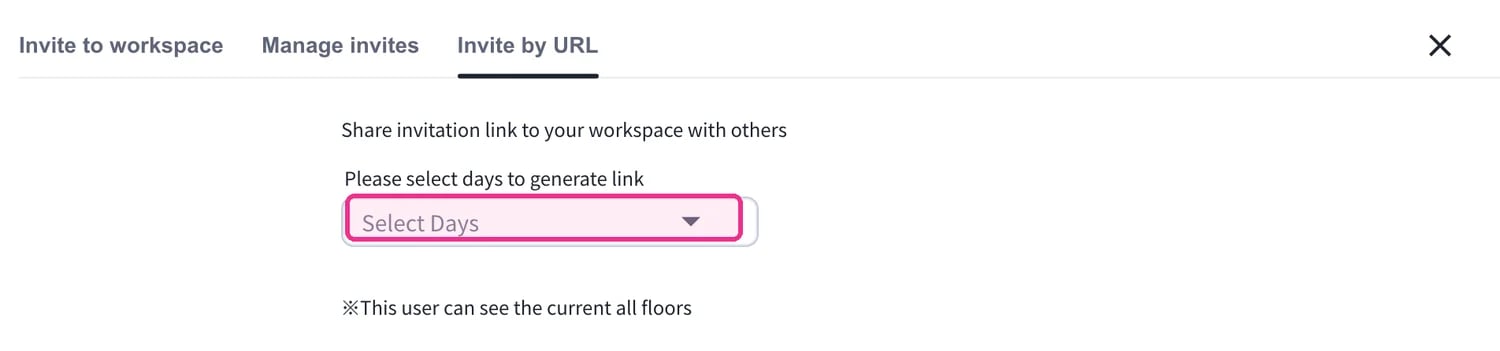 2. 複製產生的連結並分享給您想邀請的人。
 **Manage invites** 分頁會列出待處理的邀請,並讓您重新發送或撤銷這些邀請。在 **Enterprise** 方案上,還有一個 **User creation** 分頁,讓您可以直接以臨時密碼建立帳號,或從 CSV 檔案批次匯入最多 50 位使用者。
## 兩步驗證
您可以要求工作區中的所有人使用電子郵件進行兩步驗證。前往 **Settings → Workspace → Security** 並開啟 **Enable two-step verification with Email tokens for all users**(付費方案適用)。
**Manage invites** 分頁會列出待處理的邀請,並讓您重新發送或撤銷這些邀請。在 **Enterprise** 方案上,還有一個 **User creation** 分頁,讓您可以直接以臨時密碼建立帳號,或從 CSV 檔案批次匯入最多 50 位使用者。
## 兩步驗證
您可以要求工作區中的所有人使用電子郵件進行兩步驗證。前往 **Settings → Workspace → Security** 並開啟 **Enable two-step verification with Email tokens for all users**(付費方案適用)。
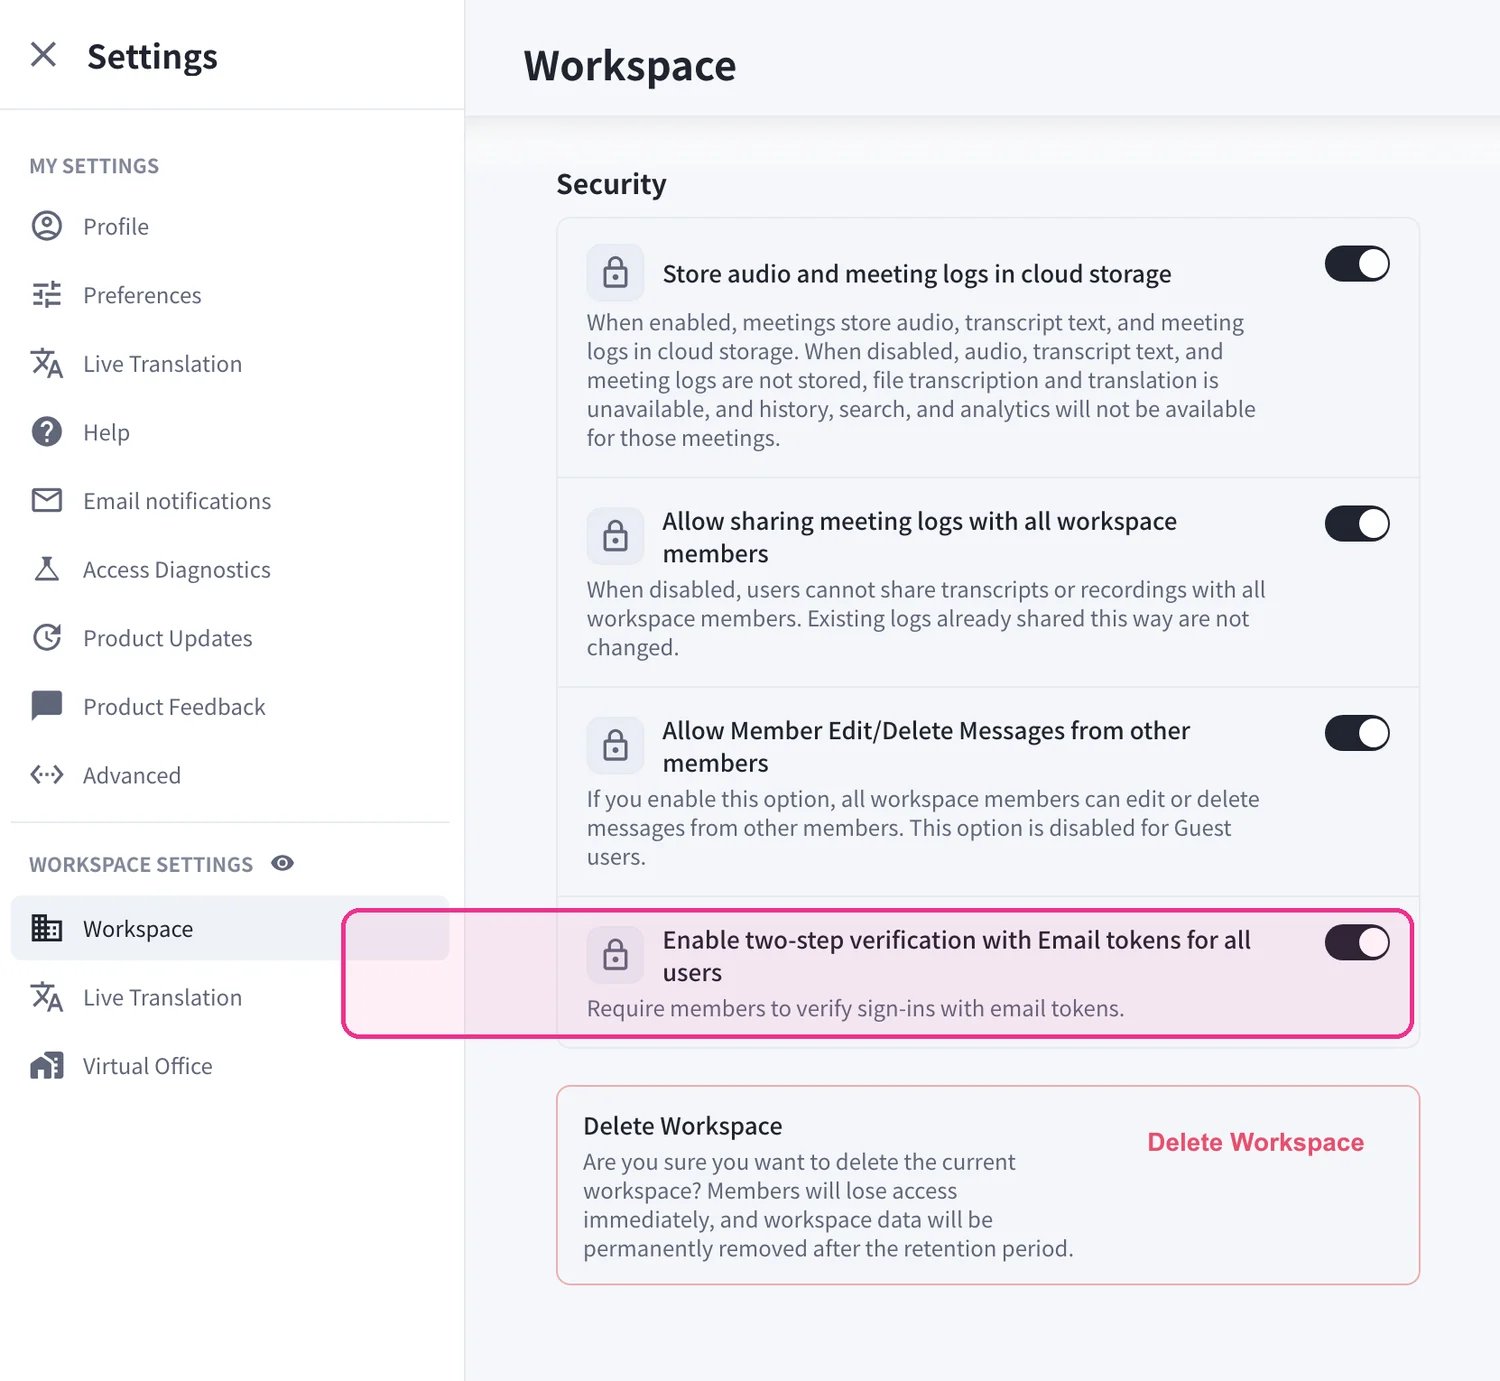 * 啟用後,受邀成員在加入時必須驗證其電子郵件,因此新成員只能使用被邀請的確切電子郵件地址進行註冊。
* **例外情況**,使用 **Google 或 Apple 帳號**登入的成員不需要進行電子郵件驗證。
* 啟用後,受邀成員在加入時必須驗證其電子郵件,因此新成員只能使用被邀請的確切電子郵件地址進行註冊。
* **例外情況**,使用 **Google 或 Apple 帳號**登入的成員不需要進行電子郵件驗證。