> ## Documentation Index
> Fetch the complete documentation index at: https://manual.voiceping.net/llms.txt
> Use this file to discover all available pages before exploring further.

# 建立發票

> 如何從時間追蹤日誌輕鬆建立發票

export const ContactZhTW = () => <>
    <Tip>
      如有任何問題，請透過<a href="https://forms.gle/6AUho7oj3zBr79e96">此表單</a>與我們聯繫。
    </Tip>

    ## 官方連結

    <CardGroup cols={2}>
      <Card title="官方網站" icon="globe" href="https://voiceping.net/en/">
        造訪官方網站
      </Card>
      <Card title="X (Twitter)" icon="x-twitter" href="https://x.com/VoicePingMedia">
        在X上追蹤我們
      </Card>
      <Card title="Facebook" icon="facebook" href="https://www.facebook.com/voiceping.inc">
        在Facebook上按讚
      </Card>
      <Card title="LinkedIn" icon="linkedin" href="https://www.linkedin.com/company/28684130/">
        在LinkedIn上連結
      </Card>
    </CardGroup>
  </>;

時間追蹤功能會自動記錄工作日誌，因此可以輕鬆建立發票。

## 開立發票

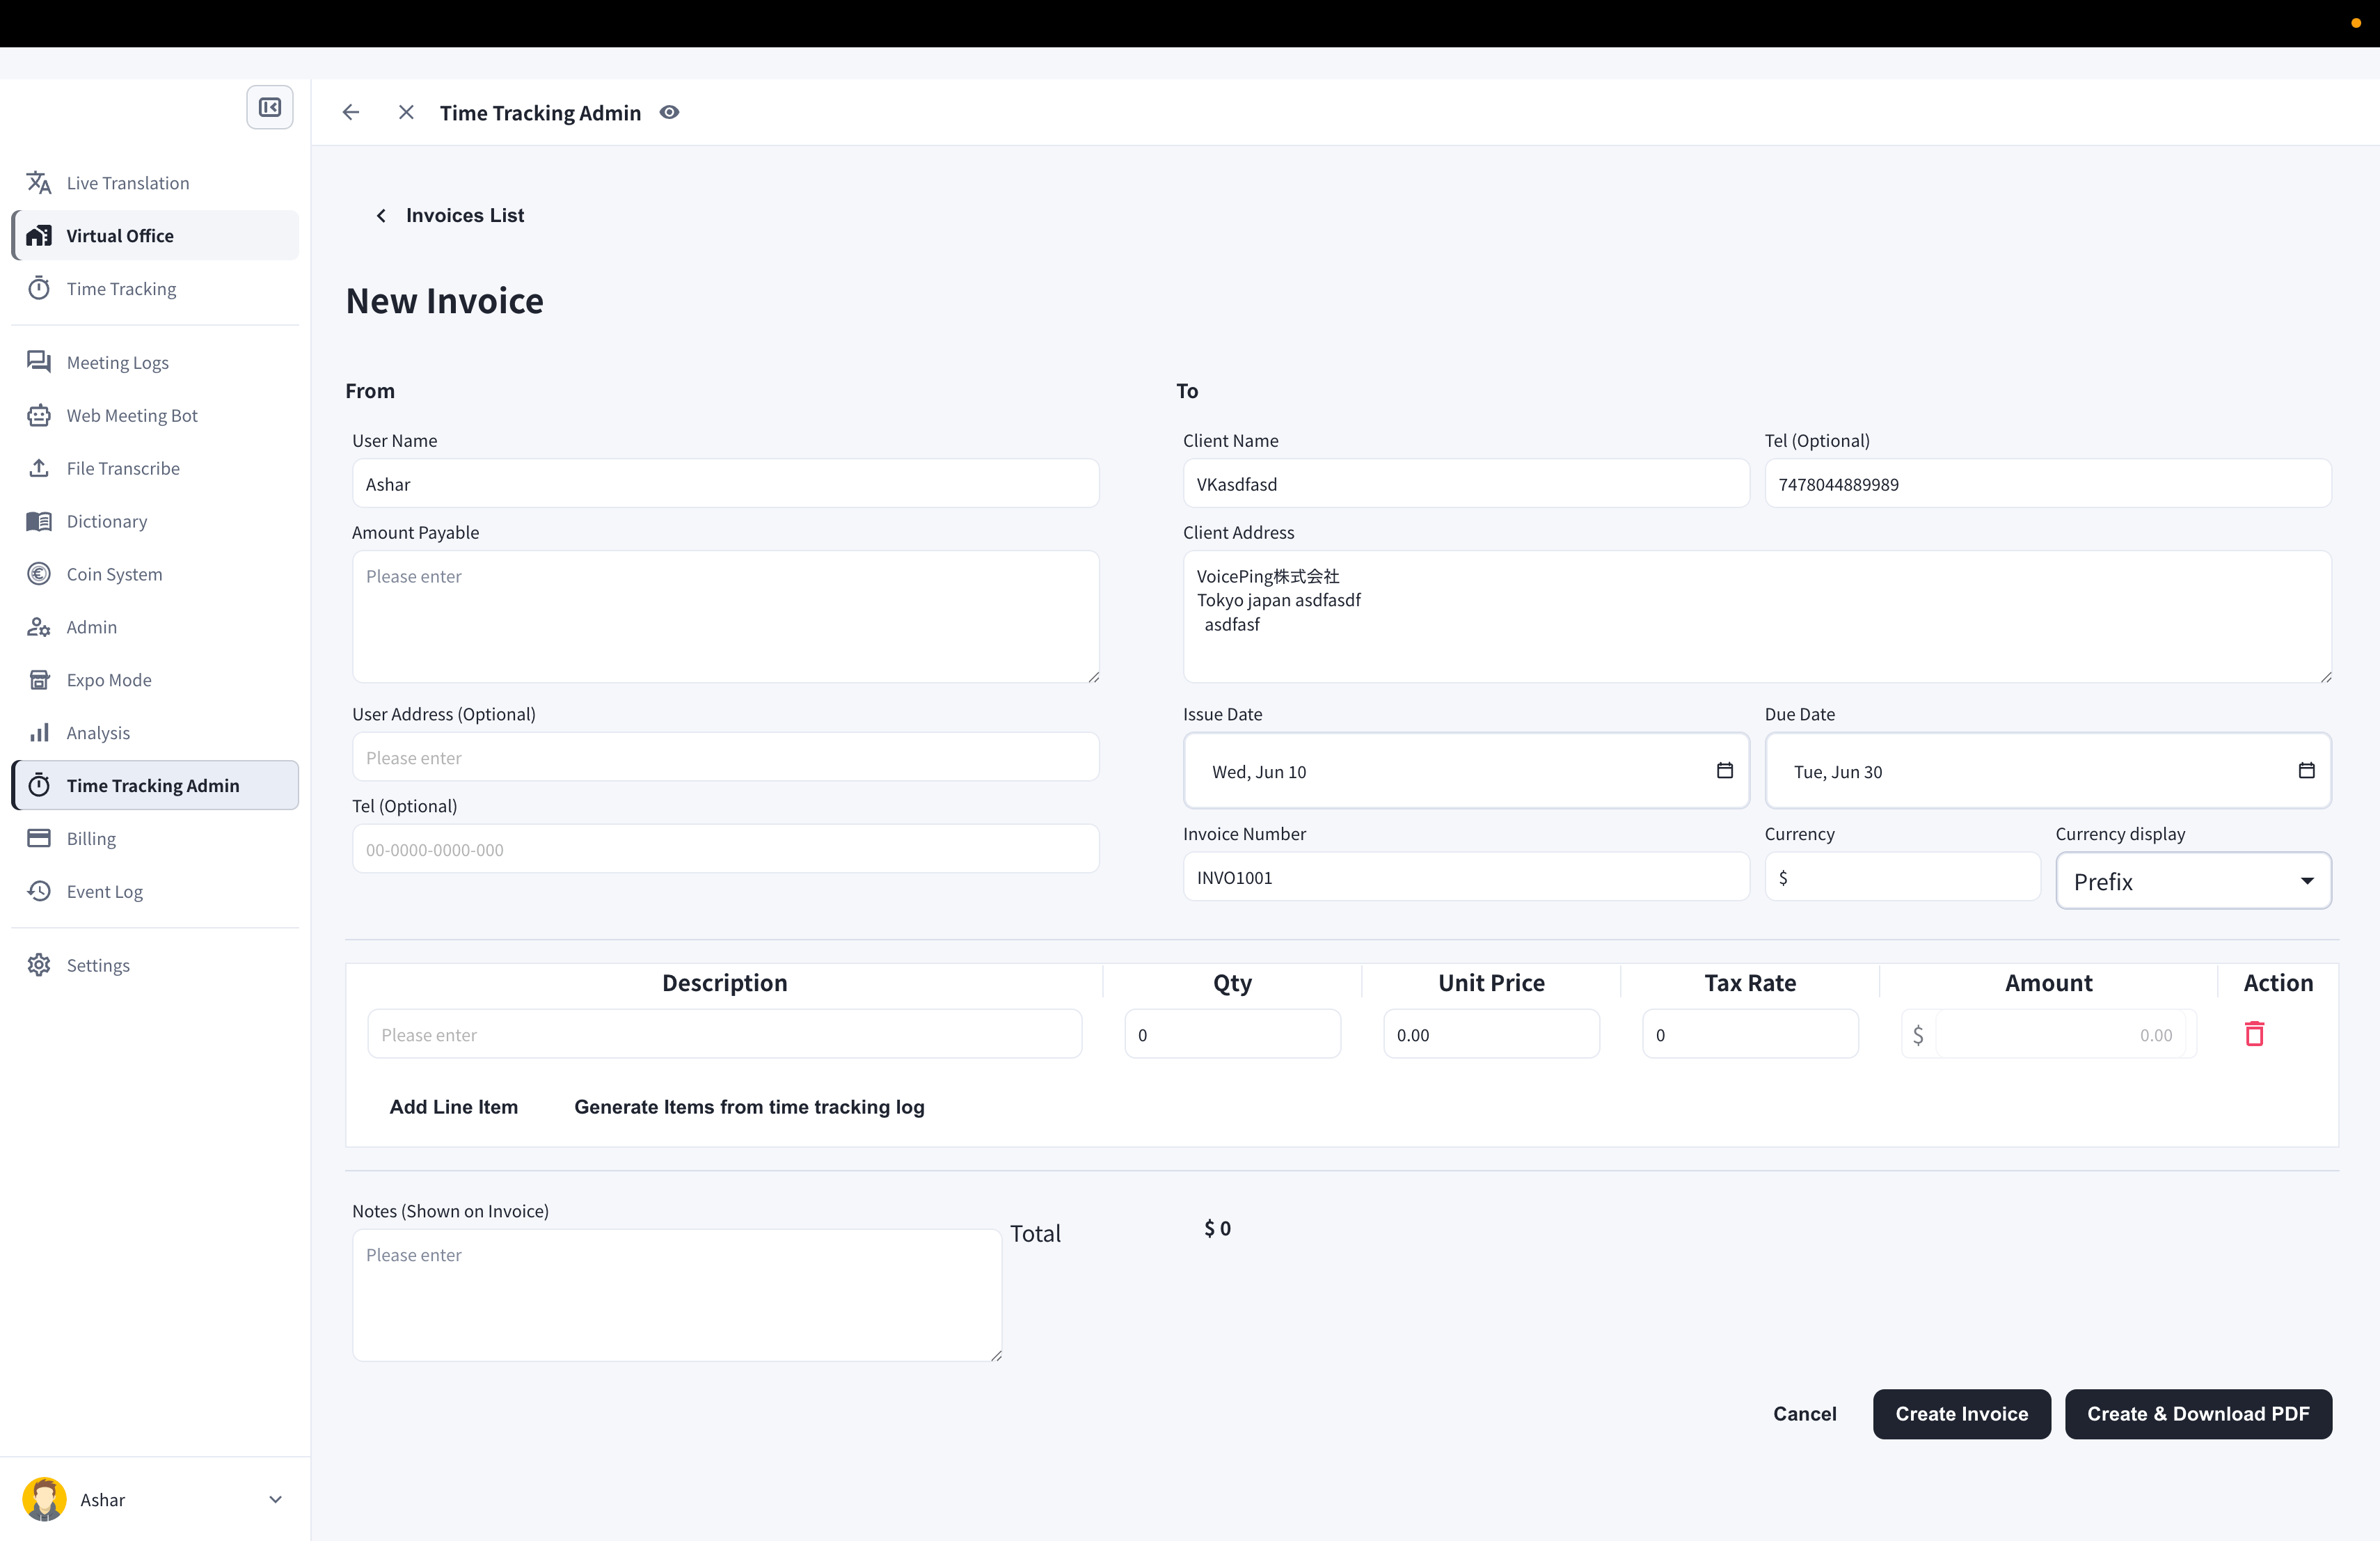
1. 從左側邊欄開啟**時間追蹤管理**，點選**發票**標籤
2. 點選**新建發票**按鈕
3. 填寫發票內容：From/To資訊、開立日期和到期日、發票編號和貨幣

<Frame>
  <img src="https://mintcdn.com/test-cf63e467/XehoYRhOCnputp7e/en/images/invoice-management/03-new-invoice.png?fit=max&auto=format&n=XehoYRhOCnputp7e&q=85&s=e68180aac704d8899c006771c75327fc" alt="含有From/To資訊、日期、貨幣和明細項目的新建發票表單" width="3420" height="2214" data-path="en/images/invoice-management/03-new-invoice.png" />
</Frame>

4. 點選**從時間追蹤記錄產生項目**
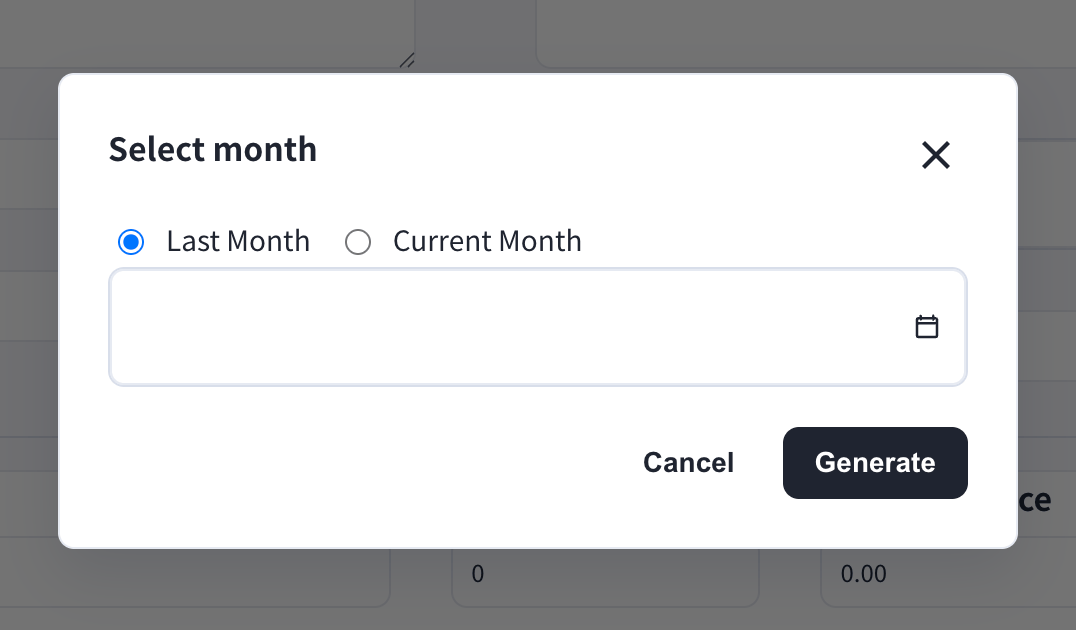
5. 選擇**上個月**或**本月**，然後點選**產生** — 明細項目會根據您的工作日誌自動建立

<Frame>
  <img src="https://mintcdn.com/test-cf63e467/XehoYRhOCnputp7e/en/images/invoice-management/04-select-month.png?fit=max&auto=format&n=XehoYRhOCnputp7e&q=85&s=23cef67fcc6b97f13269ad0110cc1033" alt="含有上個月和本月選項以及產生按鈕的選擇月份對話方塊" width="1076" height="630" data-path="en/images/invoice-management/04-select-month.png" />
</Frame>

6. 點選**建立發票**或**建立並下載 PDF**

<Note>
  如果管理者已在**發票設定**中填寫了客戶帳單資訊，這些資訊會自動填入每張新發票。
</Note>

<Tip>
  如果有未在應用程式中記錄的工作時間，可以點選**新增明細項目**進行新增。每個明細項目支援數量、單價和稅率。
</Tip>

## 編輯發票

1. 在發票清單中，點選要編輯的發票的筆形圖示
2. 編輯後，點選**儲存發票**或**儲存並下載 PDF**

<ContactZhTW />