
Access Diagnostics checks this computer and its current network. Run it again after changing a device, macOS or Windows permission, VPN, proxy, firewall, or network.
Open Access Diagnostics
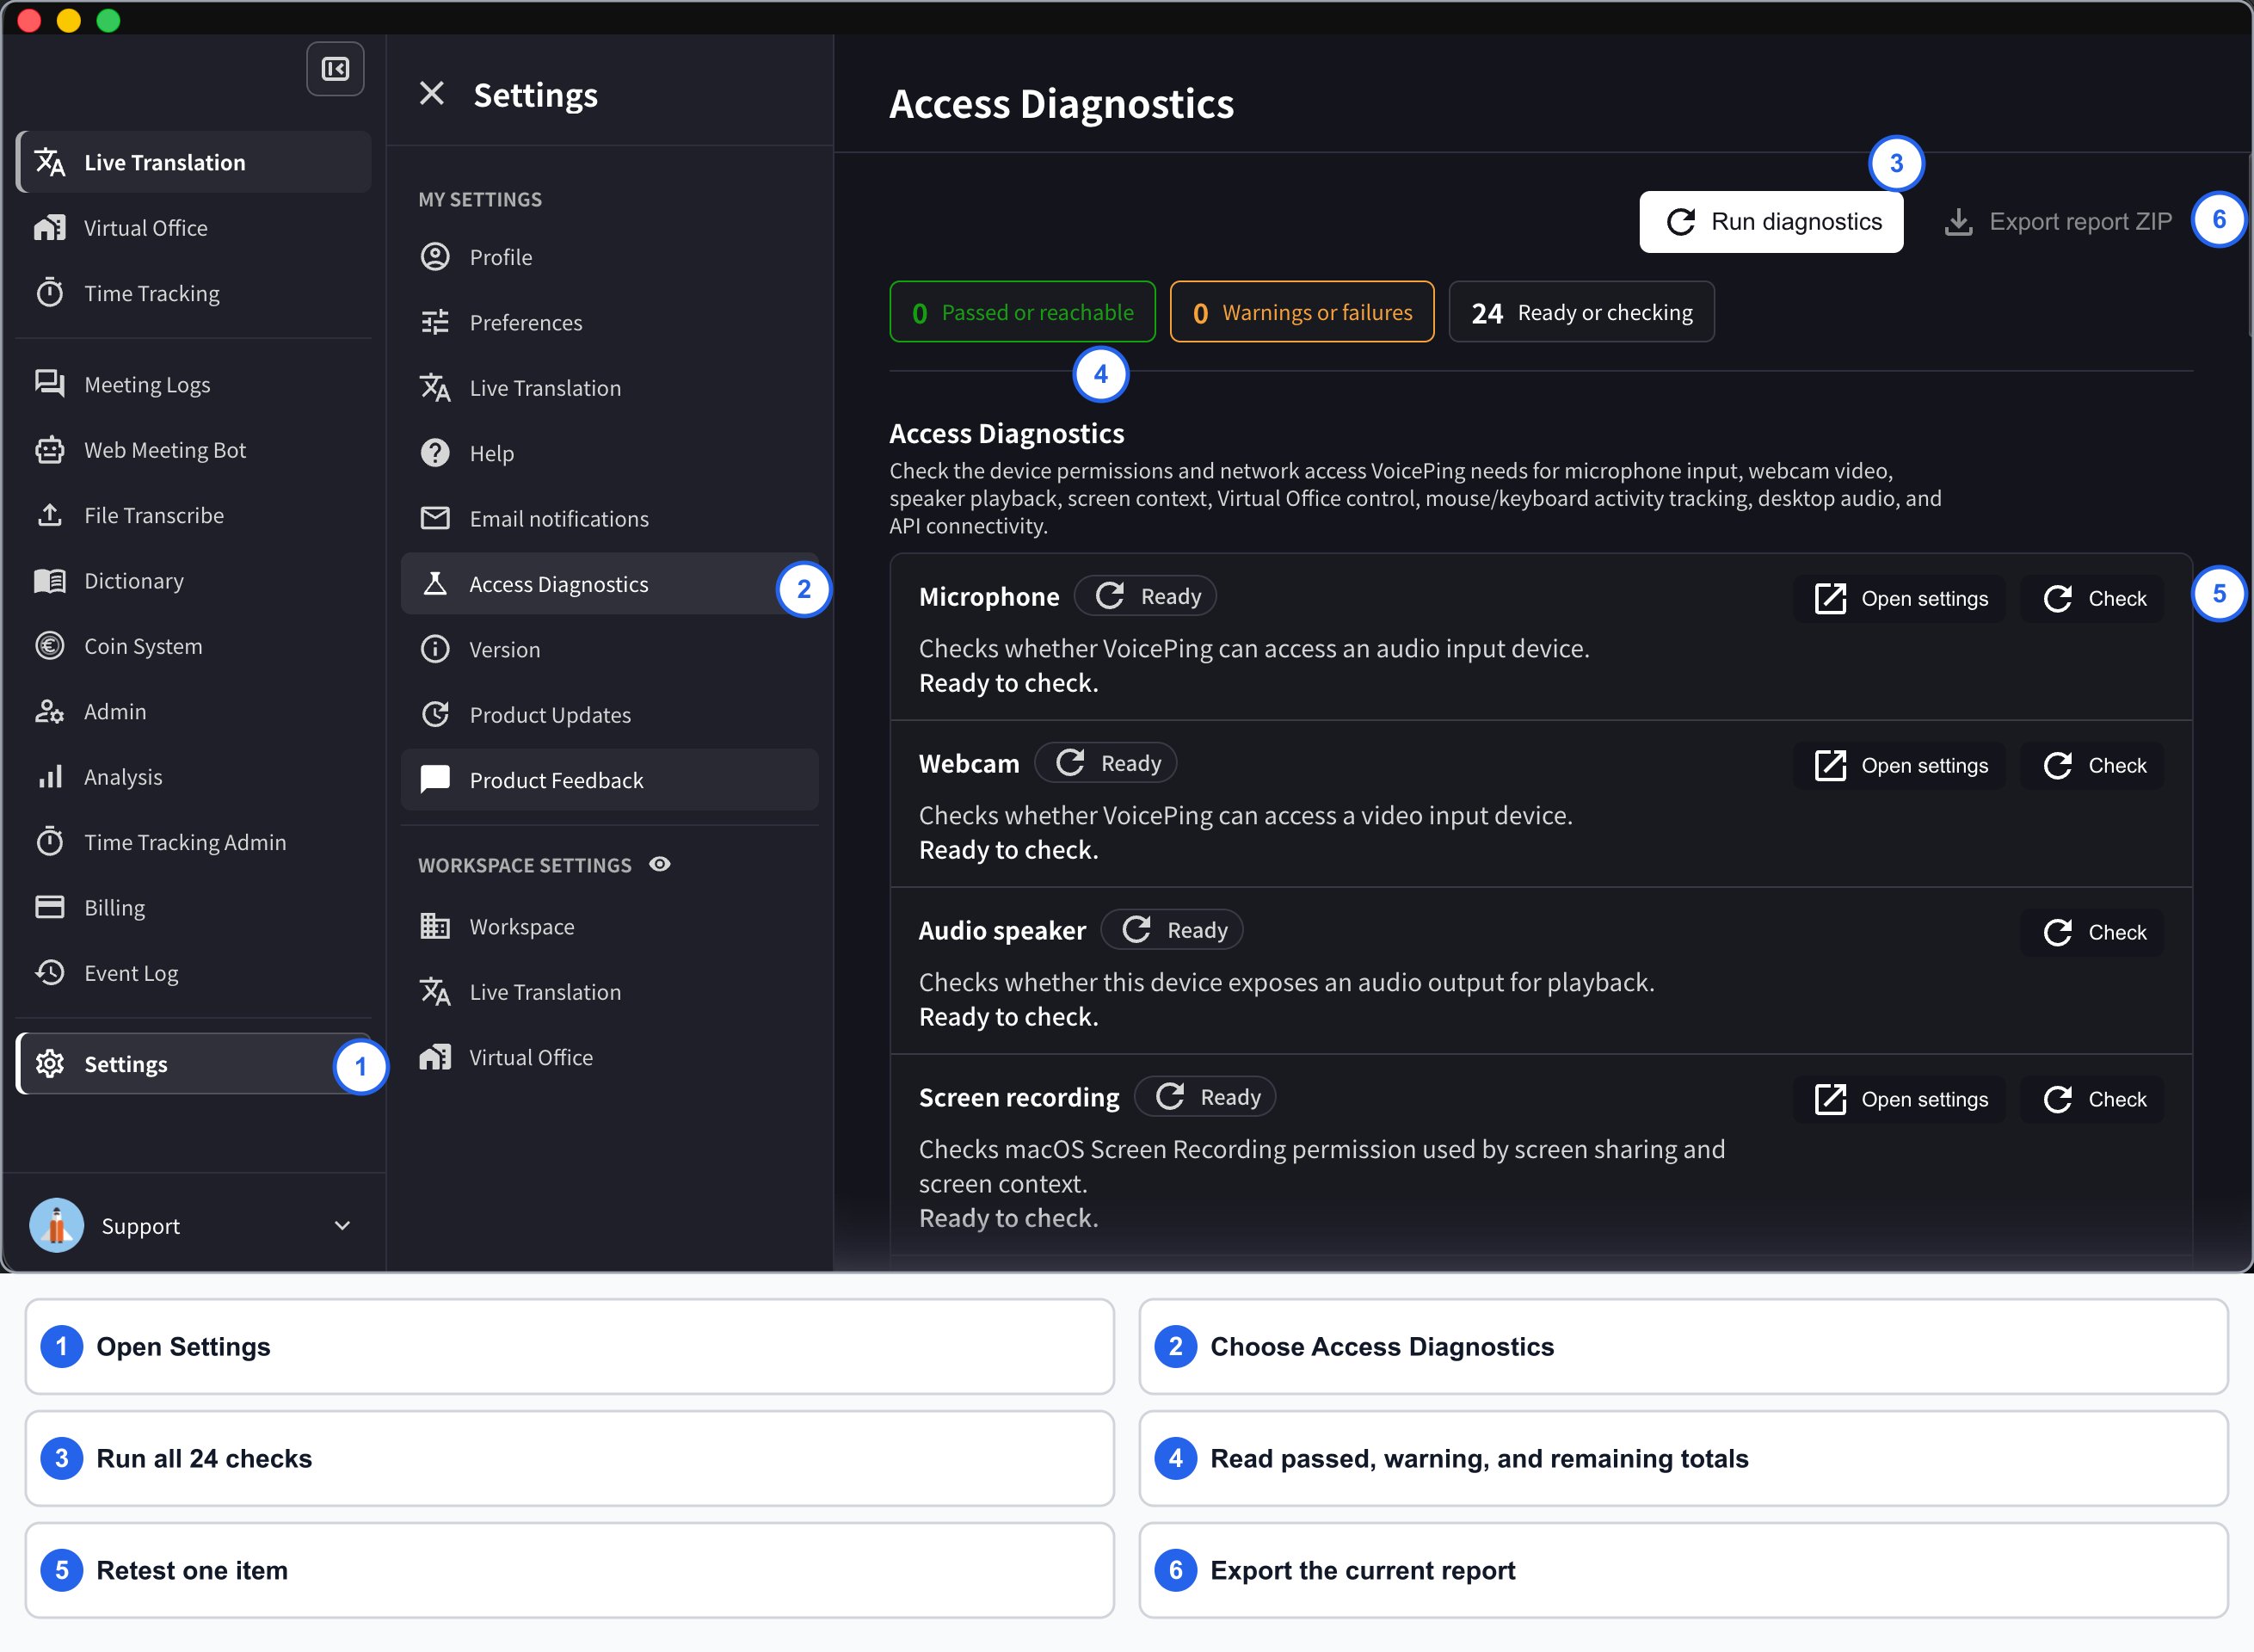
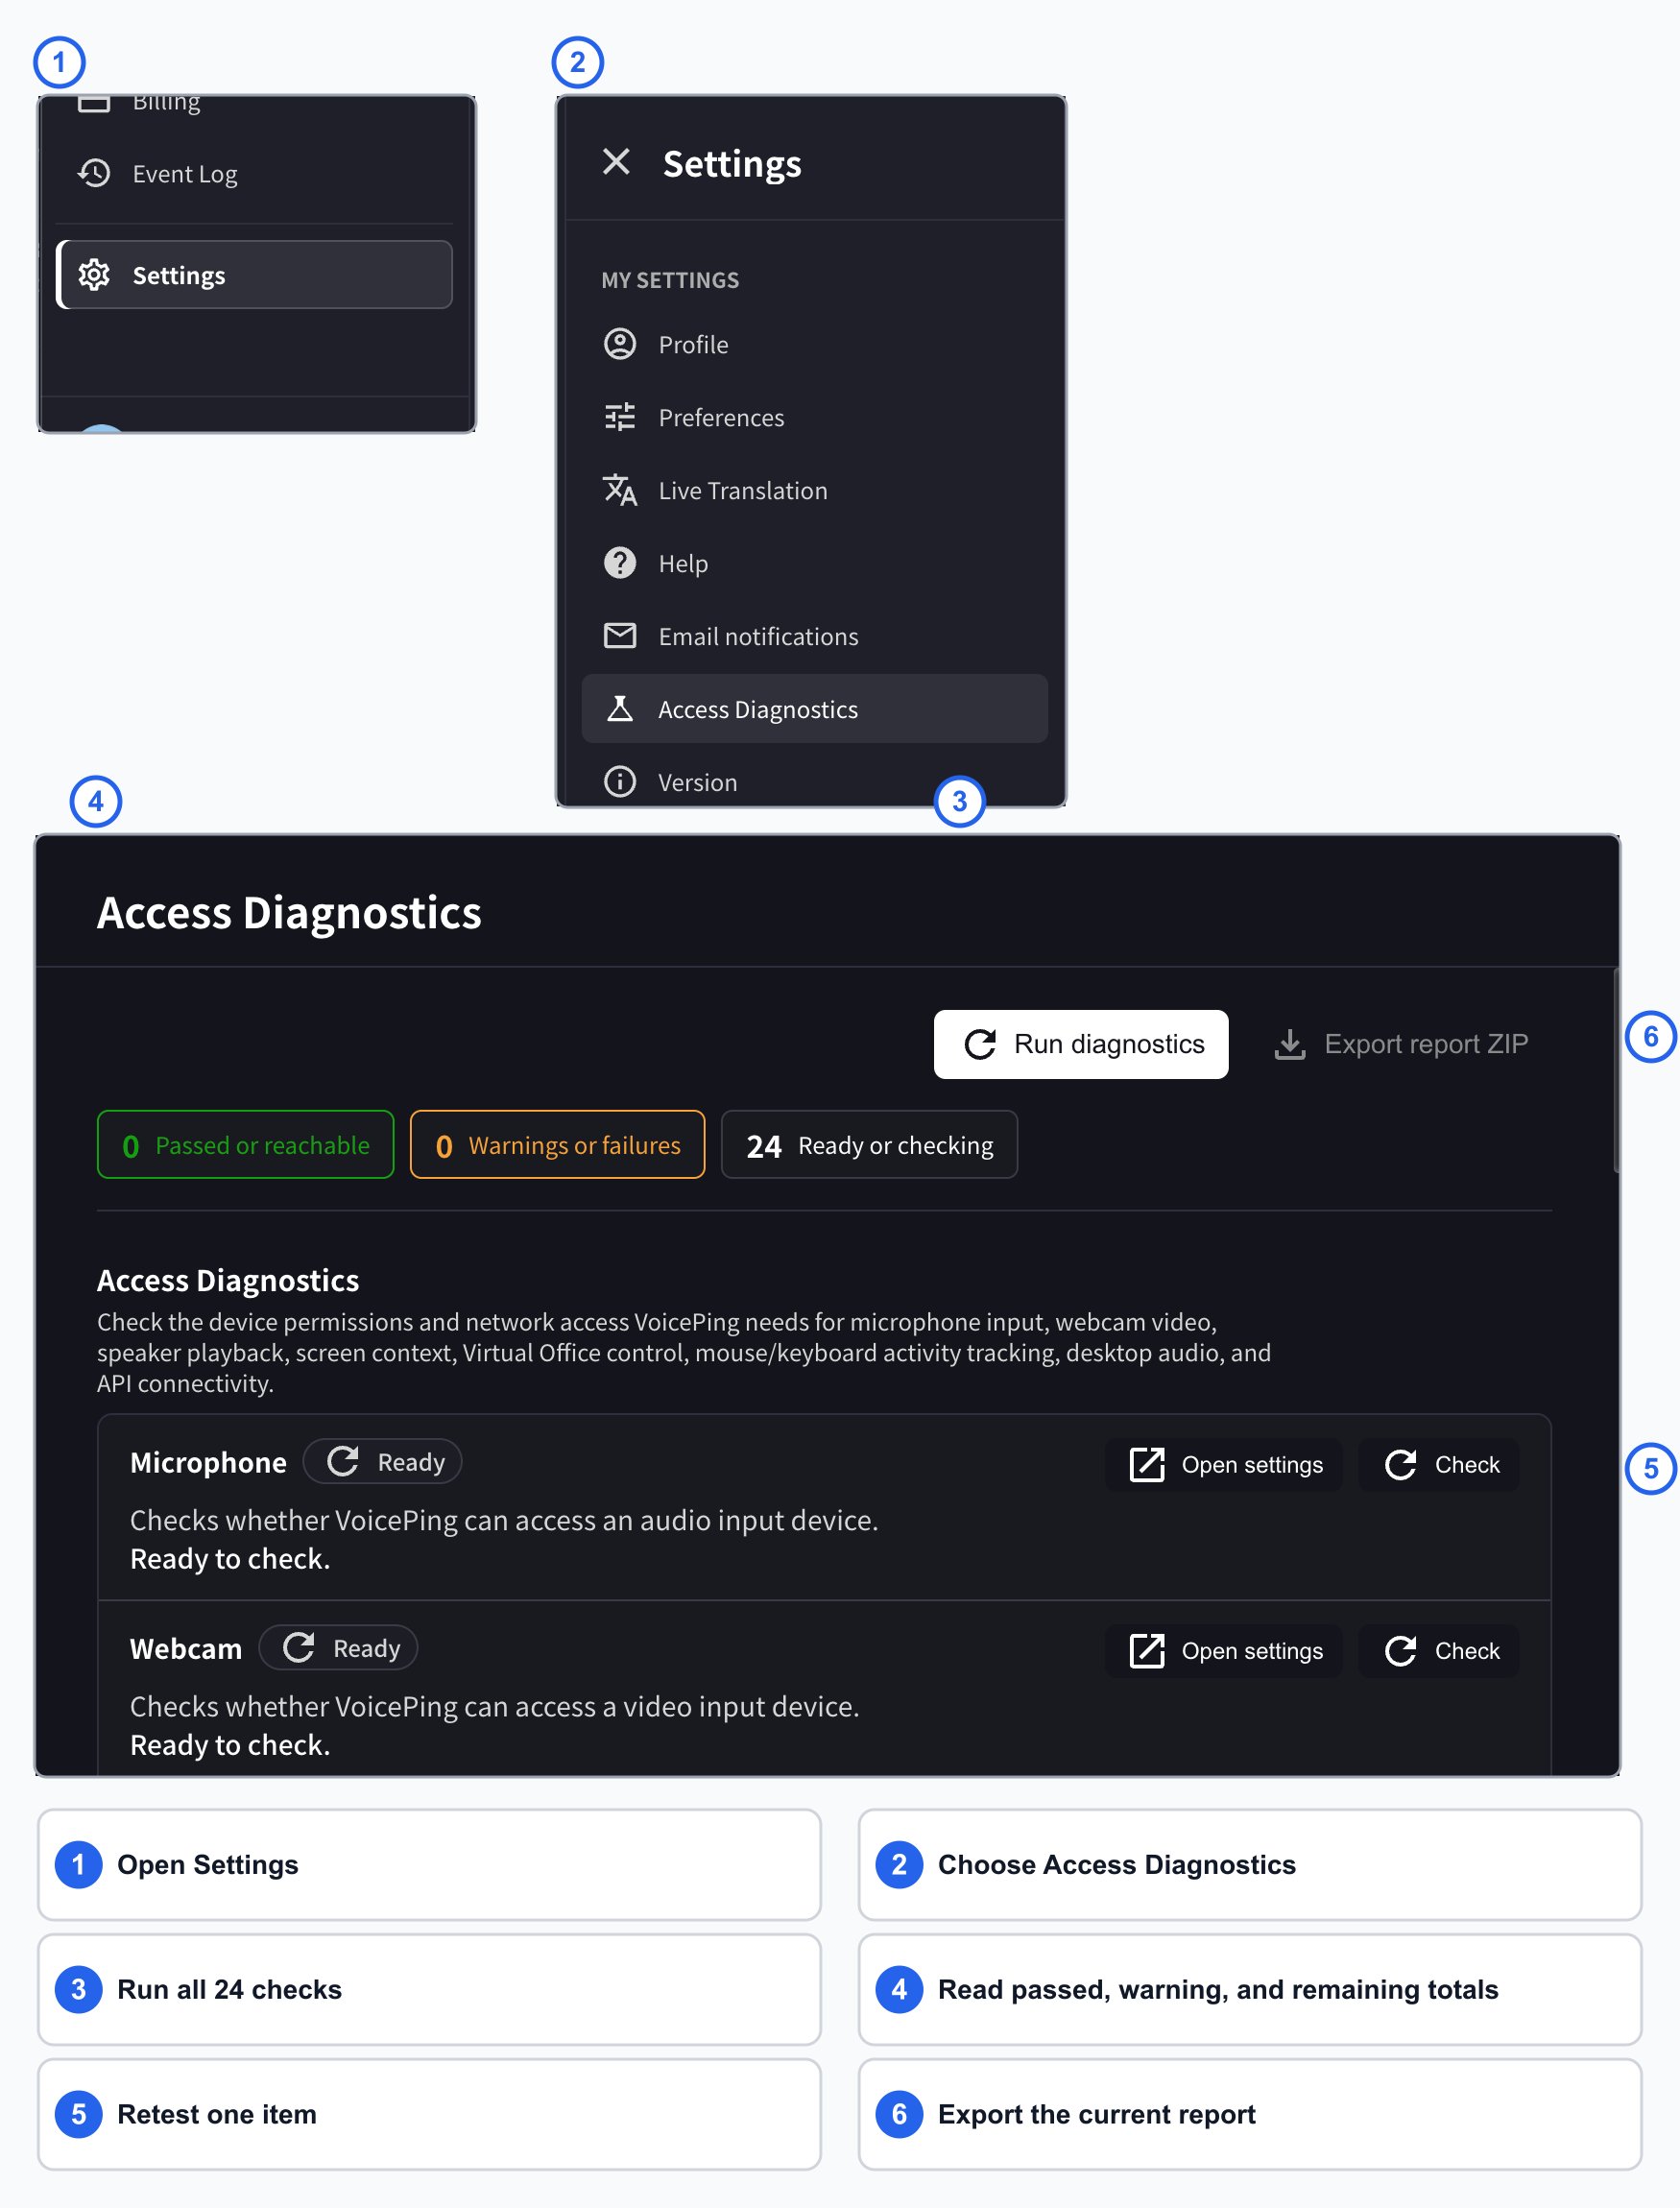
- Open the VoicePing desktop app.
- Select Settings from the bottom of the left sidebar.
- Under My Settings, select Access Diagnostics.
- Select Run diagnostics to run all 24 checks.
Understand the summary
The counters at the top update as checks finish: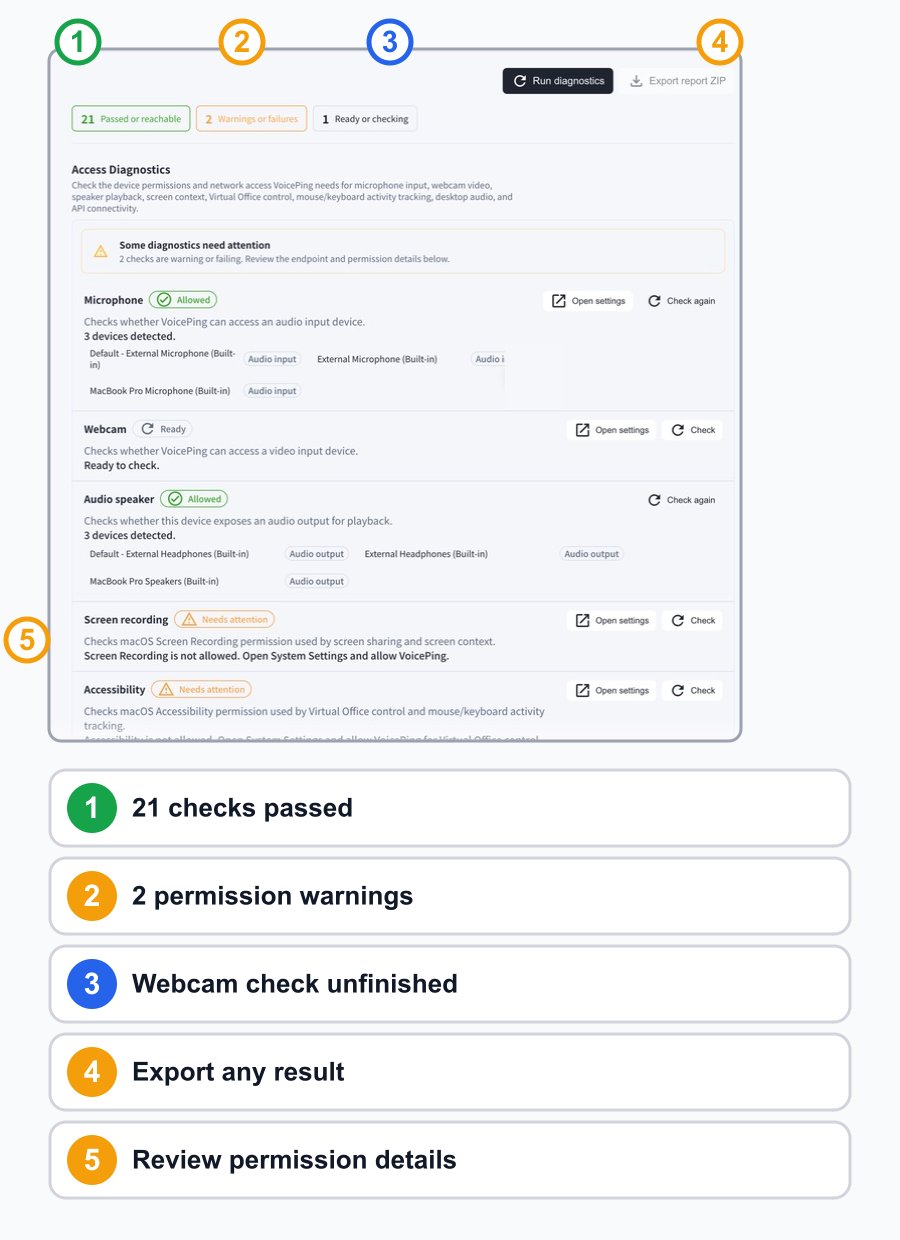
The screenshot shows an example with two missing macOS permissions and an unfinished webcam check. Your counters and device names will be different.
Device, permission, and API checks
VoicePing checks the following items before it scans the network destinations:
When a permission needs attention, select Open settings, allow VoicePing in the operating-system settings, and return to select Check again.
macOS permissions
Open System Settings → Privacy & Security, then check the relevant section:- Microphone
- Camera
- Screen & System Audio Recording
- Accessibility
Network allowlist checks
The Network allowlist section checks every documented VoicePing destination required by the core app, Live Translation, Virtual Office, assets, and authentication. Each result shows the destination, protocol, and response time.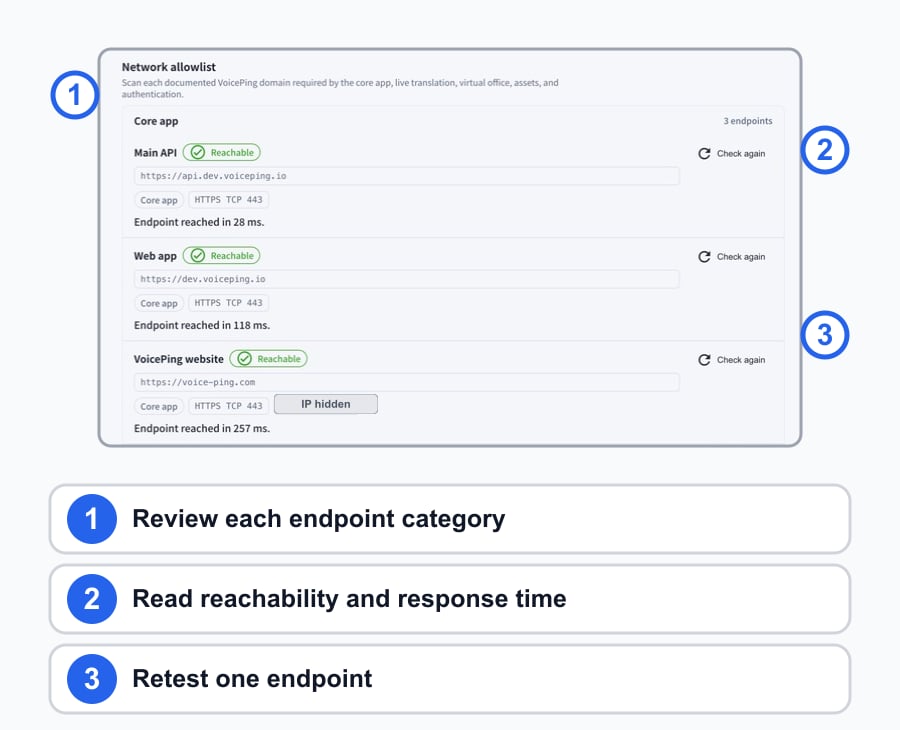
- Disconnect from a VPN or proxy temporarily, when your organization permits it.
- Try another network to identify whether the current network is blocking VoicePing.
- Ask your IT administrator to review Network Communication Protocol (Firewall).
- Run the affected destination again after the network rule is updated.
LiveKit (Virtual Office)
The LiveKit media connectivity check covers only the audio and video delivery used by Virtual Office. It does not test media delivery for other VoicePing features. The check creates a short diagnostic session and reports these subchecks: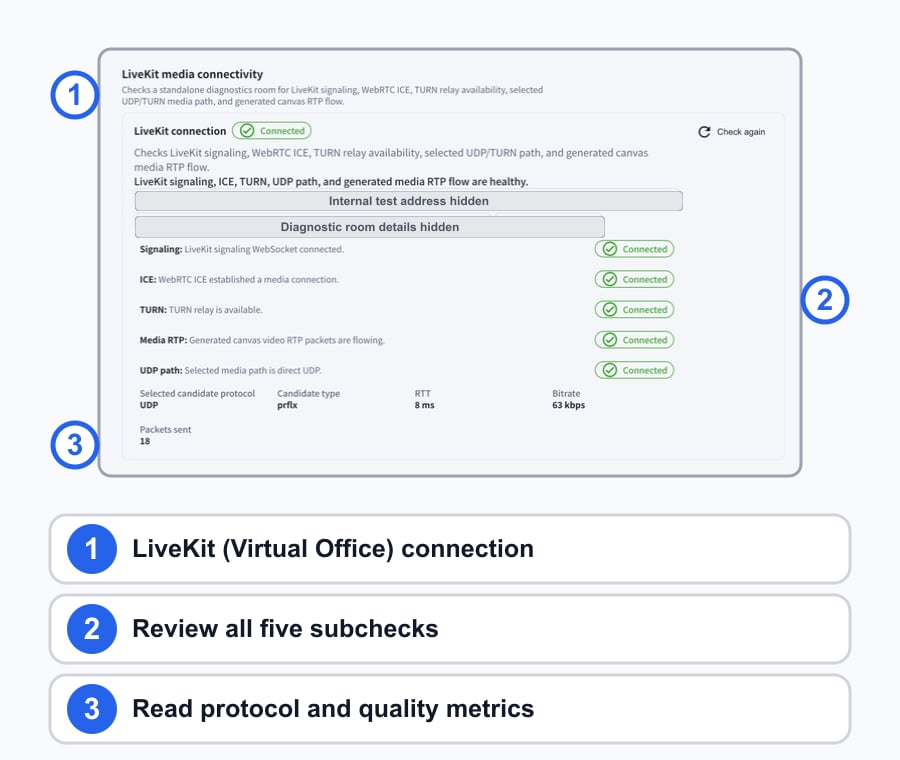
The screenshots show an example run in VoicePing STG. Destinations, response times, candidate types, and metrics vary by environment. Internal test addresses and diagnostic-room details are hidden in the manual.
The result can also show the selected protocol and candidate type, round-trip time, bitrate, and packets sent. Give these details to your IT administrator when Virtual Office audio or video performs poorly even though the main API is reachable.
Export a report
Export report ZIP exports the current diagnostic report regardless of whether checks pass, warn, fail, or remain unfinished.- Run the checks you want included, or select Run diagnostics to check all 24 items at once.
- Select Export report ZIP.
- Save the ZIP and share it only with your authorized IT administrator or VoicePing support.
If a check does not finish
If a result remains Checking:- Select its individual Check action again.
- Confirm the related operating-system permission is enabled.
- Close other applications that may be using the same microphone or camera.
- Quit and reopen VoicePing, then rerun the check.
- Capture the visible result and contact your workspace administrator or send product feedback if the status still does not change.