
Only workspace owners and managers can manage members. For a comparison of each role’s permissions, see Member Types and Permissions in VoicePing.
Open Manage Users
- Open VoicePing and select Admin from the left sidebar.
- Select the Manage Users tab.
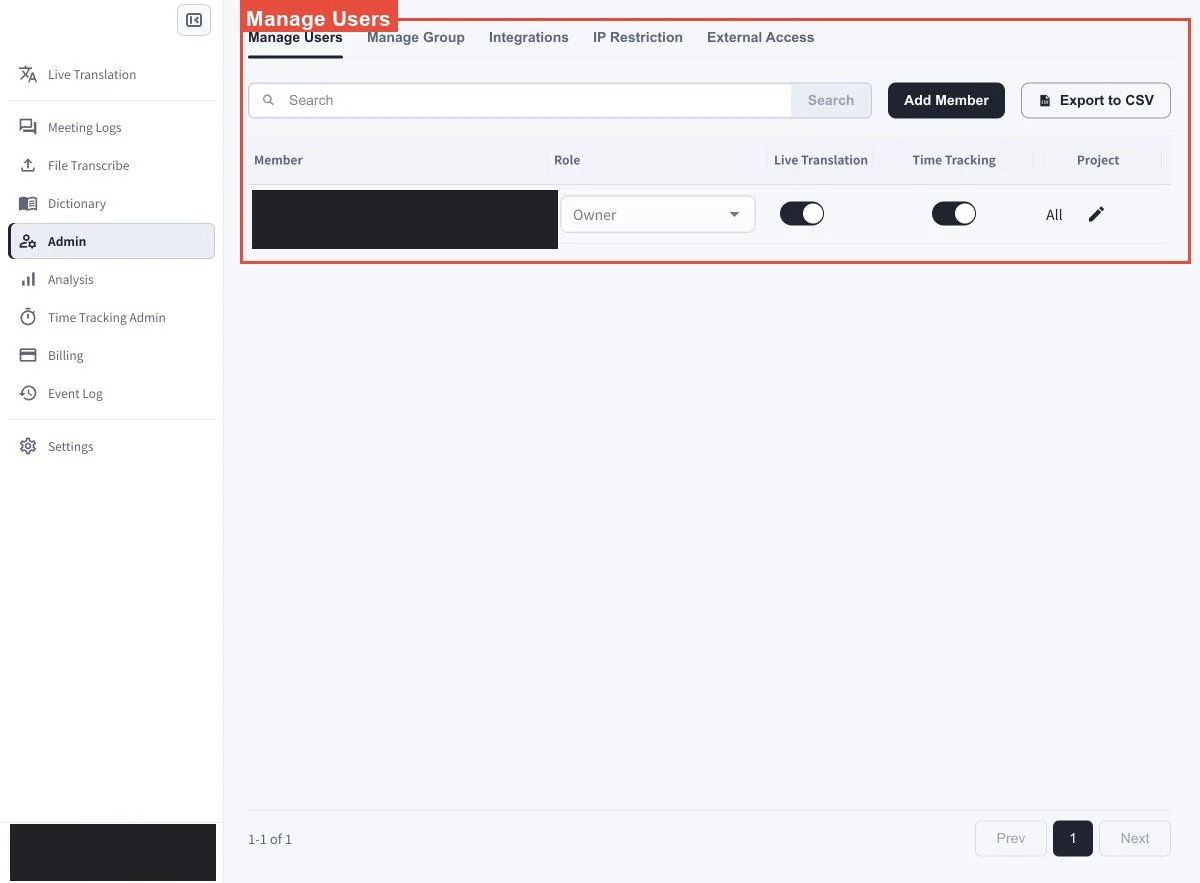
Screen Guide
Change a Member’s Role
Find the member and open the dropdown in the Role column. Select the role you want to assign. The workspace owner’s row displays Owner. Owner permissions and ownership are handled differently from ordinary member-role changes; see Member Types and Permissions in VoicePing before changing administrative access.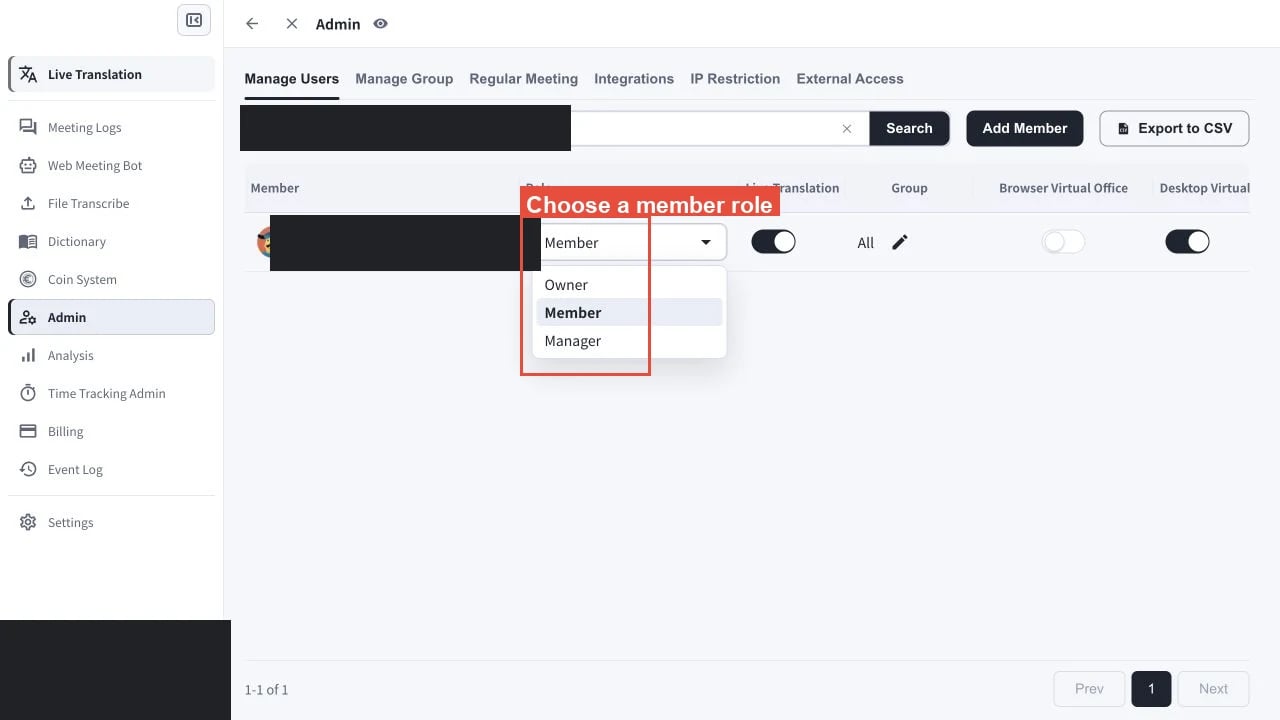
Prerequisite: Role changes, ownership transfer, and removal require another active member who is not the current workspace owner.
Transfer Ownership or Remove a Member
Transfer Workspace Ownership
Open the other active member’s Role dropdown and choose Owner. Only the current workspace owner can review and submit the transfer. A manager who is not the owner sees the restriction below and cannot select Change.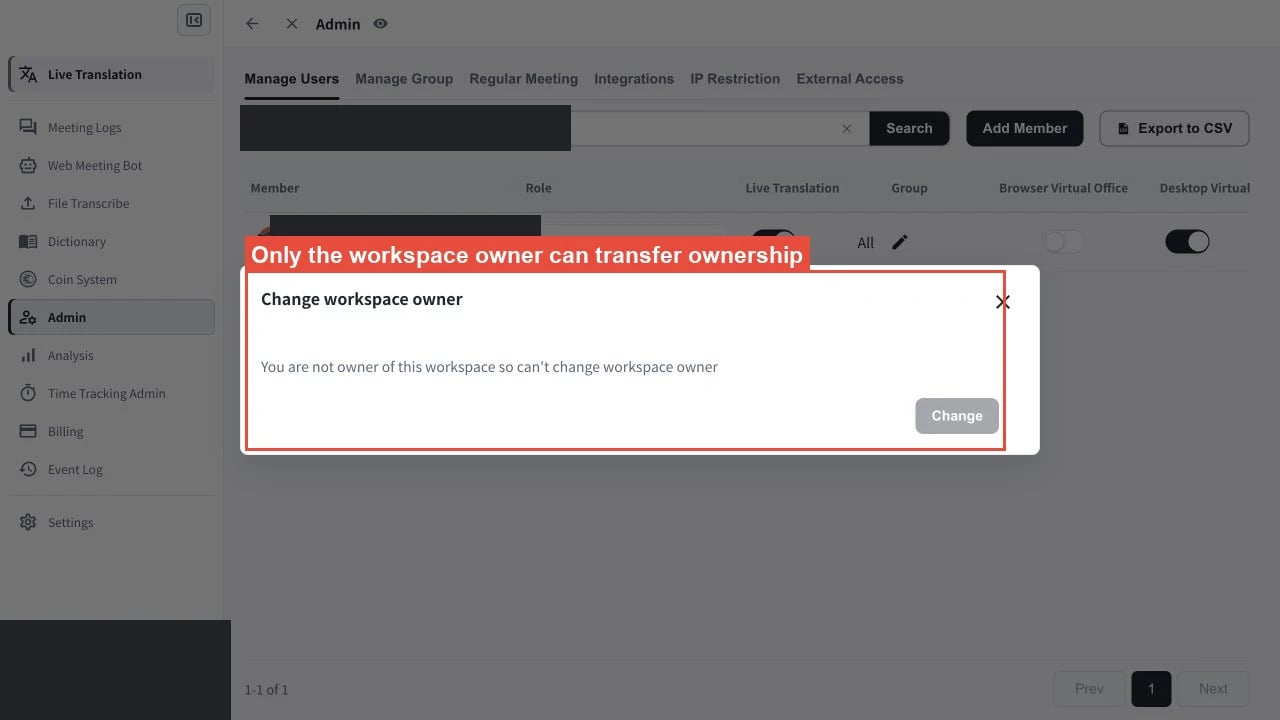
Remove a Member
Find the member in Manage Users, select the delete action for that member, and confirm the removal. The current workspace owner cannot be removed; transfer ownership first if that account must leave the workspace.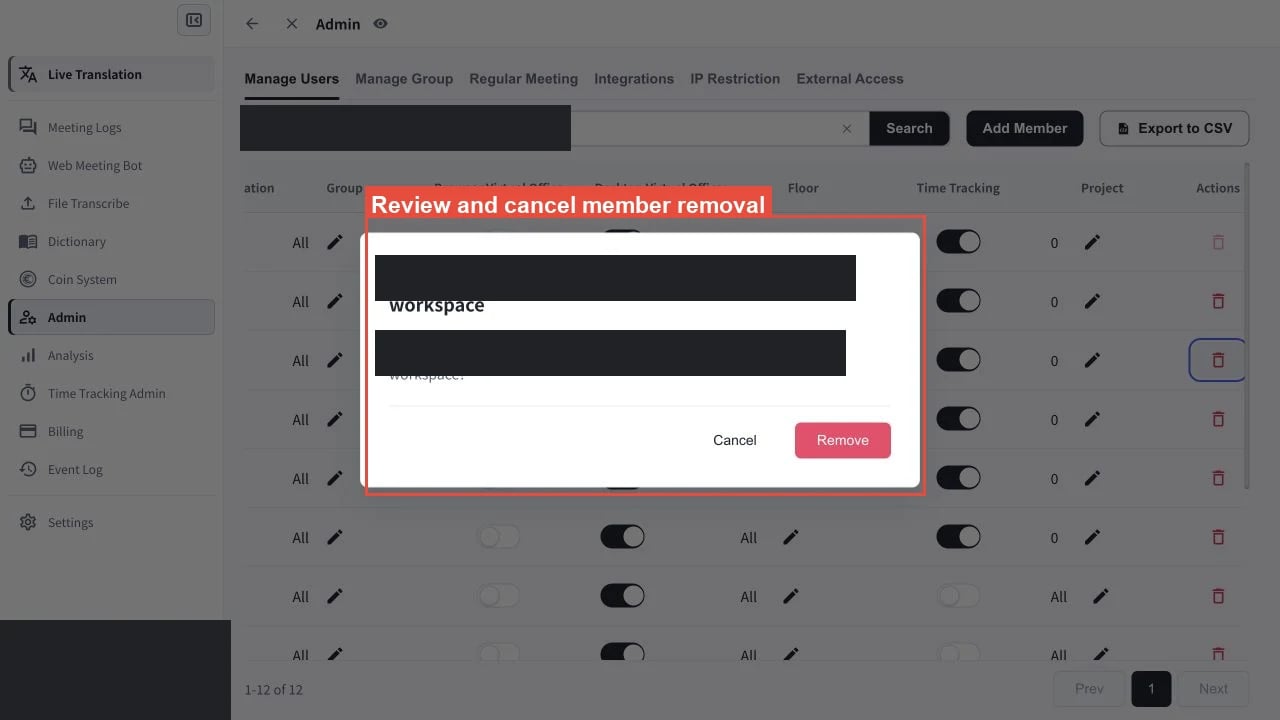
Change Feature Access
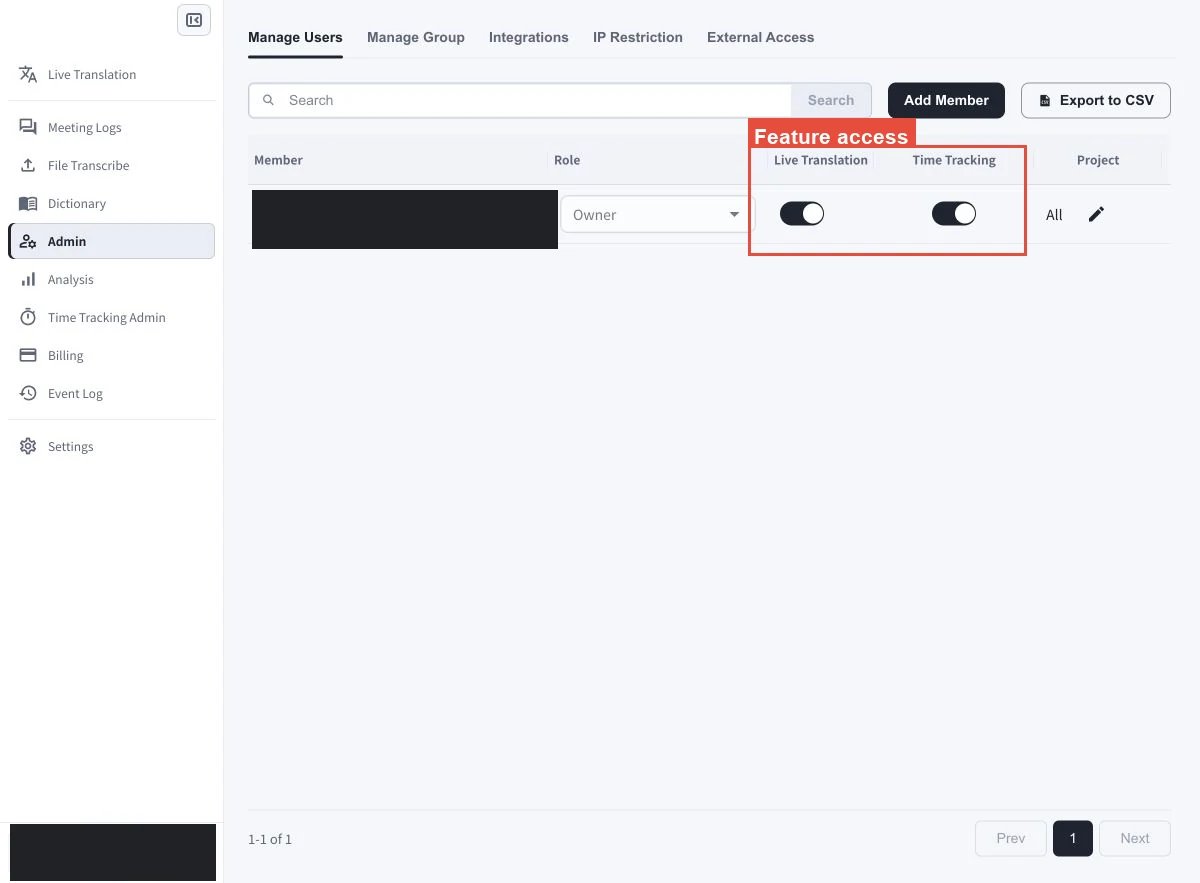
Use the switches in a member’s row to control that member’s access. A switch in the on position grants access; a switch in the off position removes access. The per-member feature controls include:- Live Translation
- Browser Virtual Office
- Desktop Virtual Office
- Time Tracking
Change Group, Project, or Floor Access
- Groups: In the Group column, select the pencil icon in the member’s row. Choose the groups that the member should be able to access, then save the change.
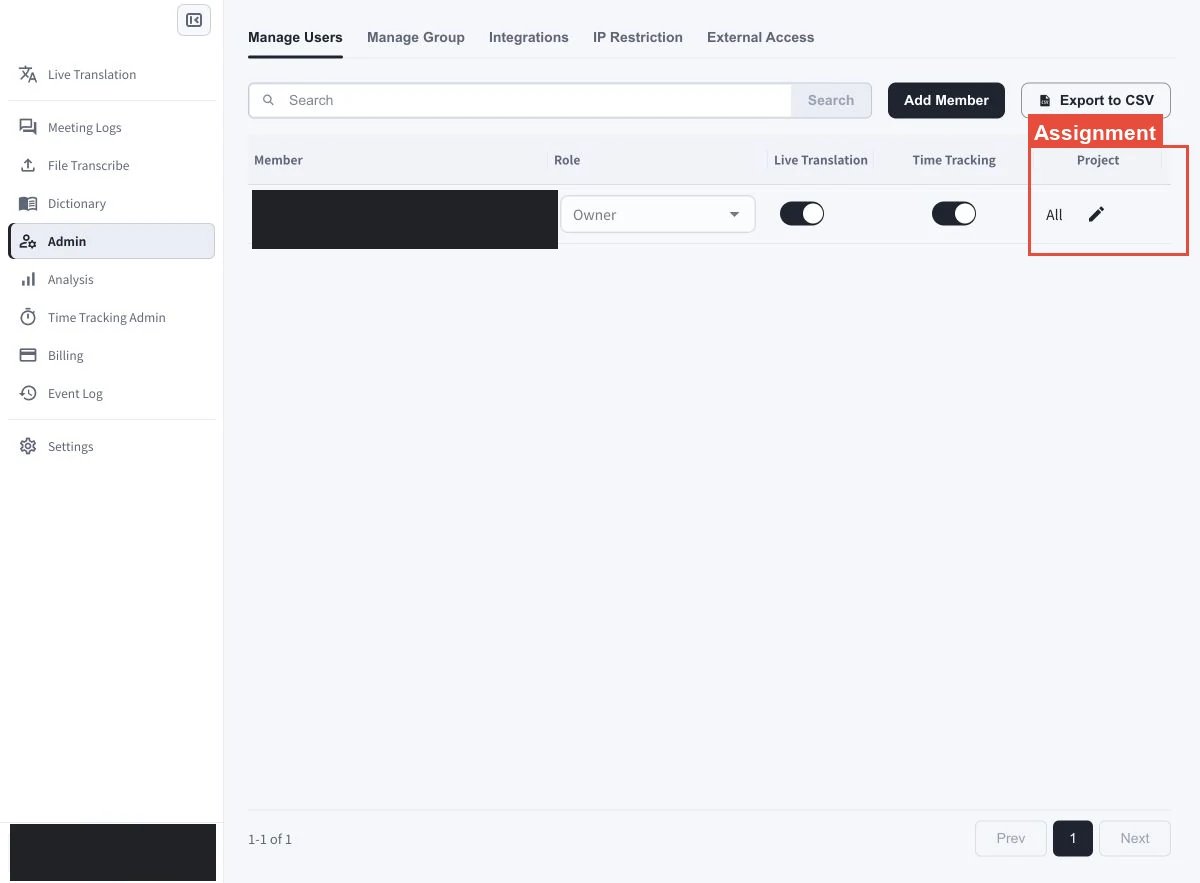
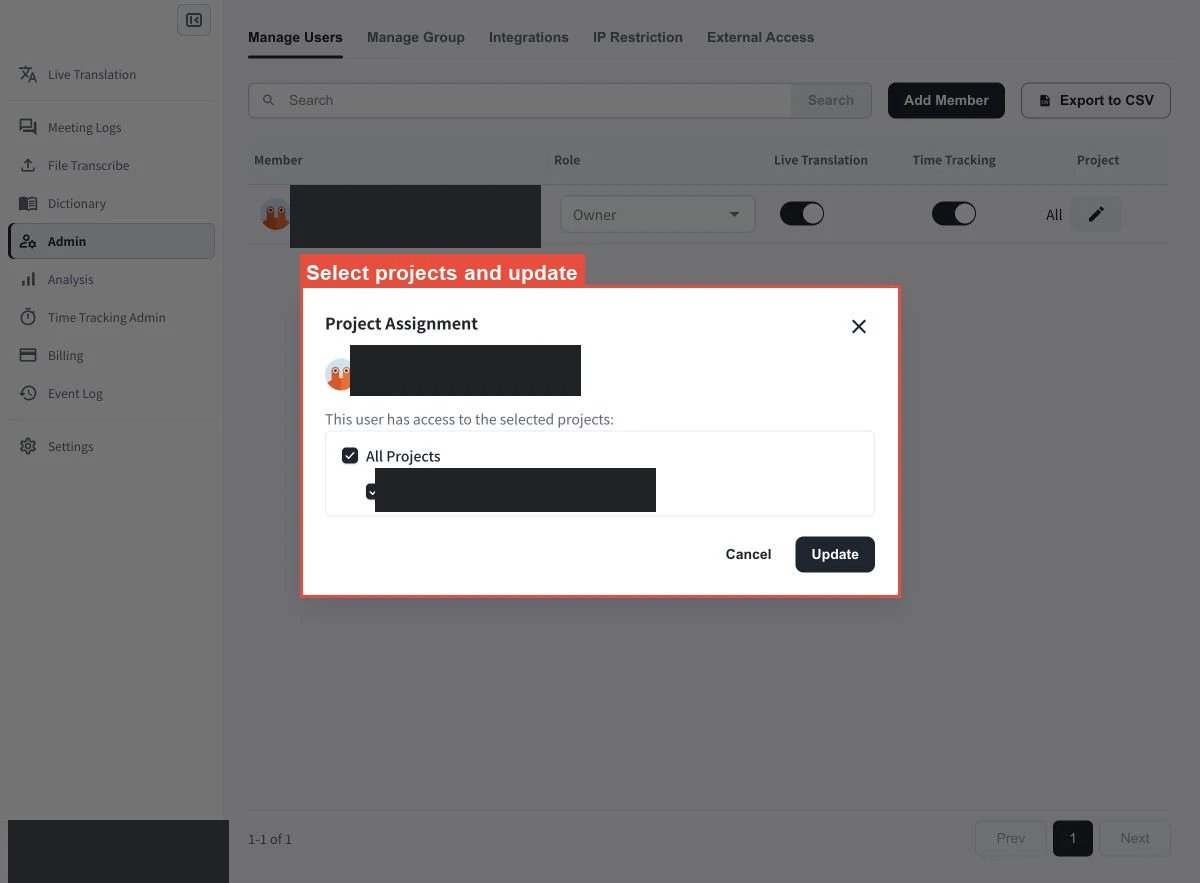
- Projects: Use the member’s project assignment control to choose the time-tracking and management projects they can access.
- Floors: Use the floor assignment control to choose the virtual office floors the member can access.
Plan and Floor Policy Notes
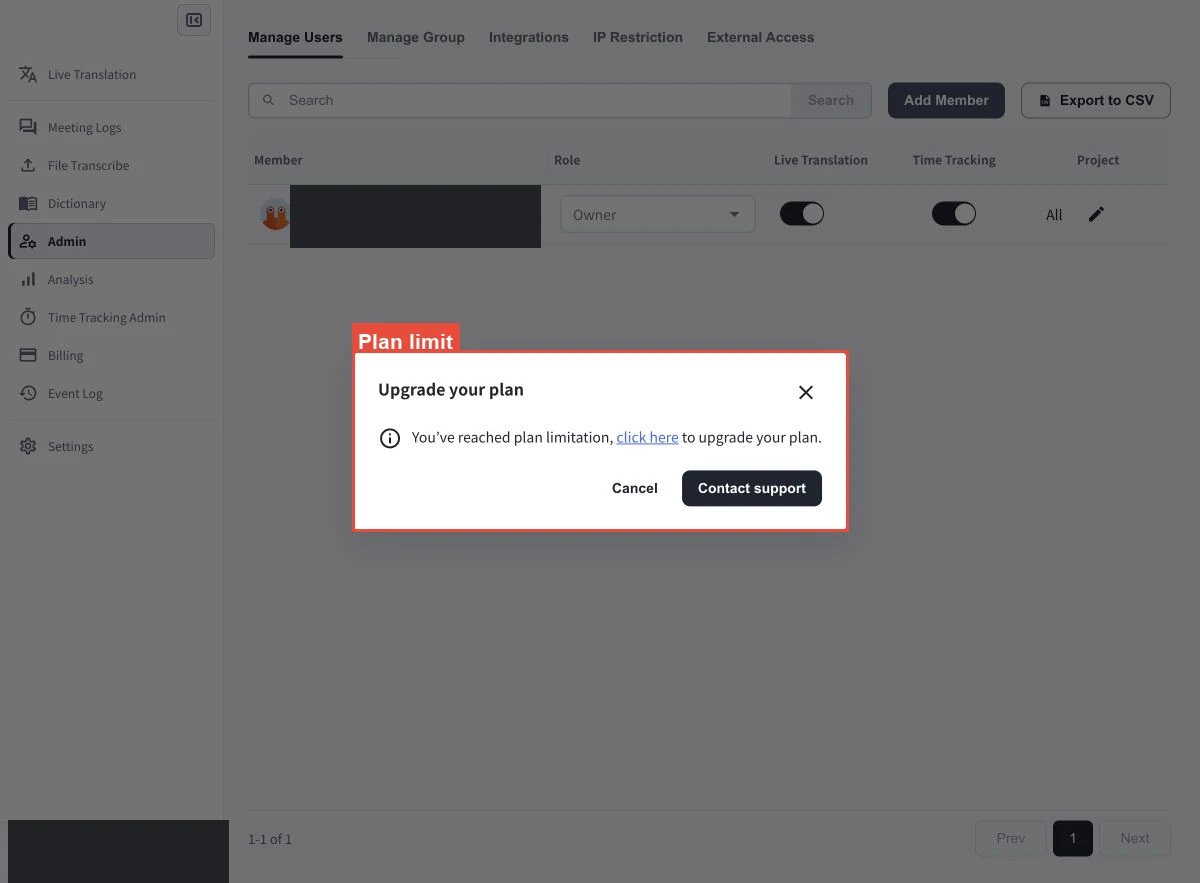
- Invitations are blocked when the workspace reaches the plan’s member limit.
- Switching to the Individual plan is blocked until only one active member remains.
- Floor assignments are policy-aware. Group and member policy settings can prevent an otherwise available floor assignment.
Add or Export Members
- Select Add Member to invite new workspace members.
- Select Export to CSV to download the current member list.
Related
Official Links
Official Website
Visit our official website
X (Twitter)
Follow us on X
Like us on Facebook
Connect on LinkedIn