
- Both speaker and participant sides require an internet environment. Internet speed verification is possible at https://fast.com/. 30mbps or higher recommended (minimum 10mbps required)
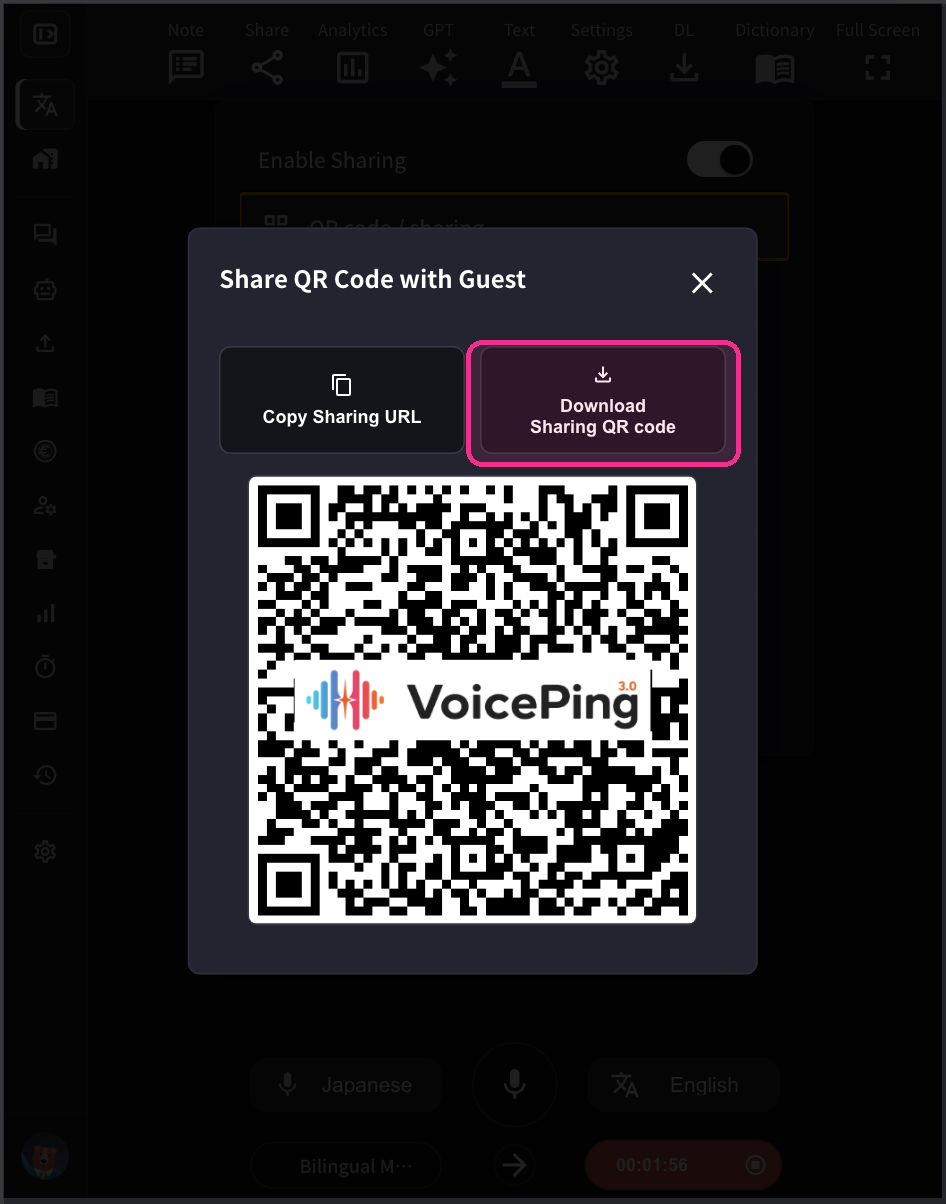
- QR code image/URL is fixed and does not change even when you start/end sessions. Security can be enhanced by setting a password
- Microphone and translation text reading function on the participant side can be enabled/disabled
- You can hide the transcription language and display only the translation text
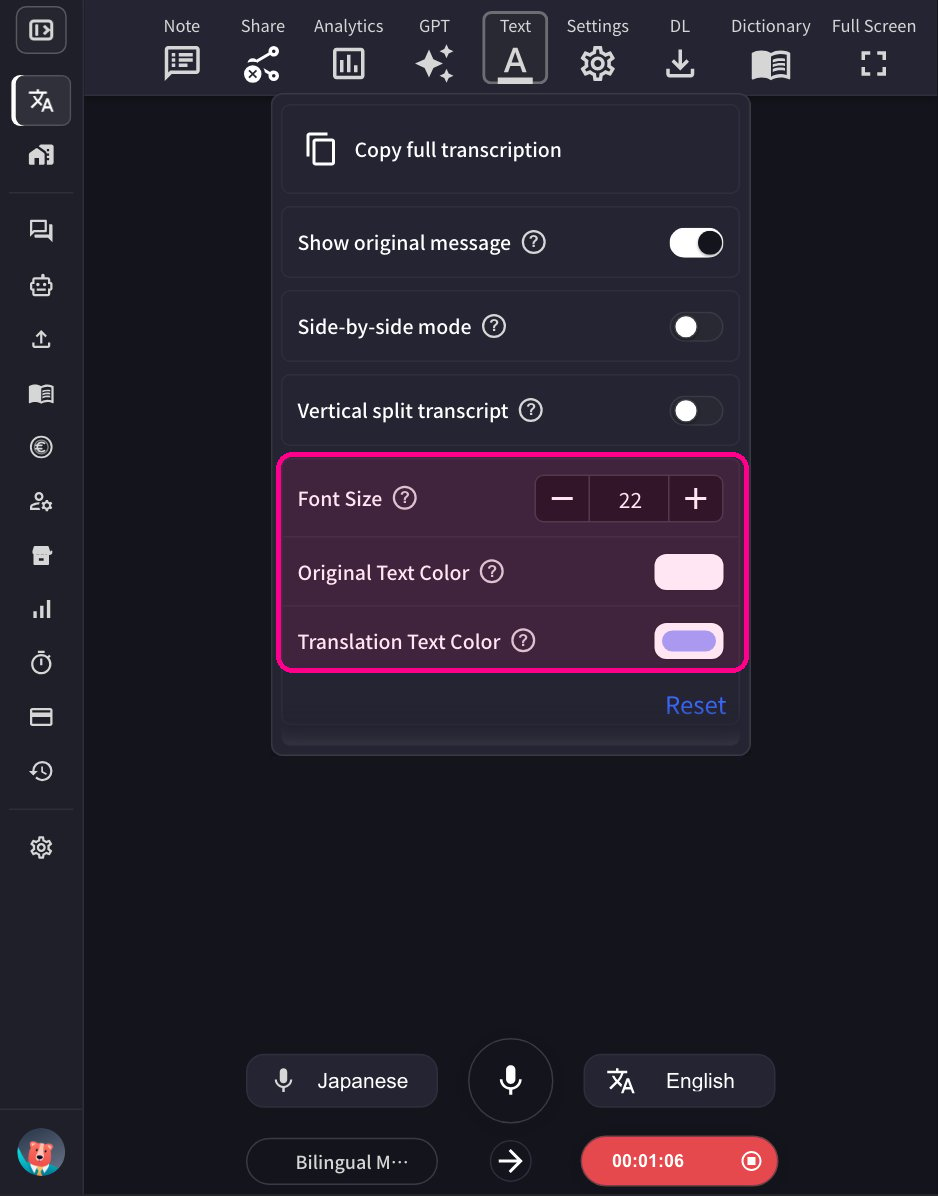
- Text color and size can be changed
- Translation speed can be adjusted
How to Use
- Launch the VoicePing app and click “Start Translation”.
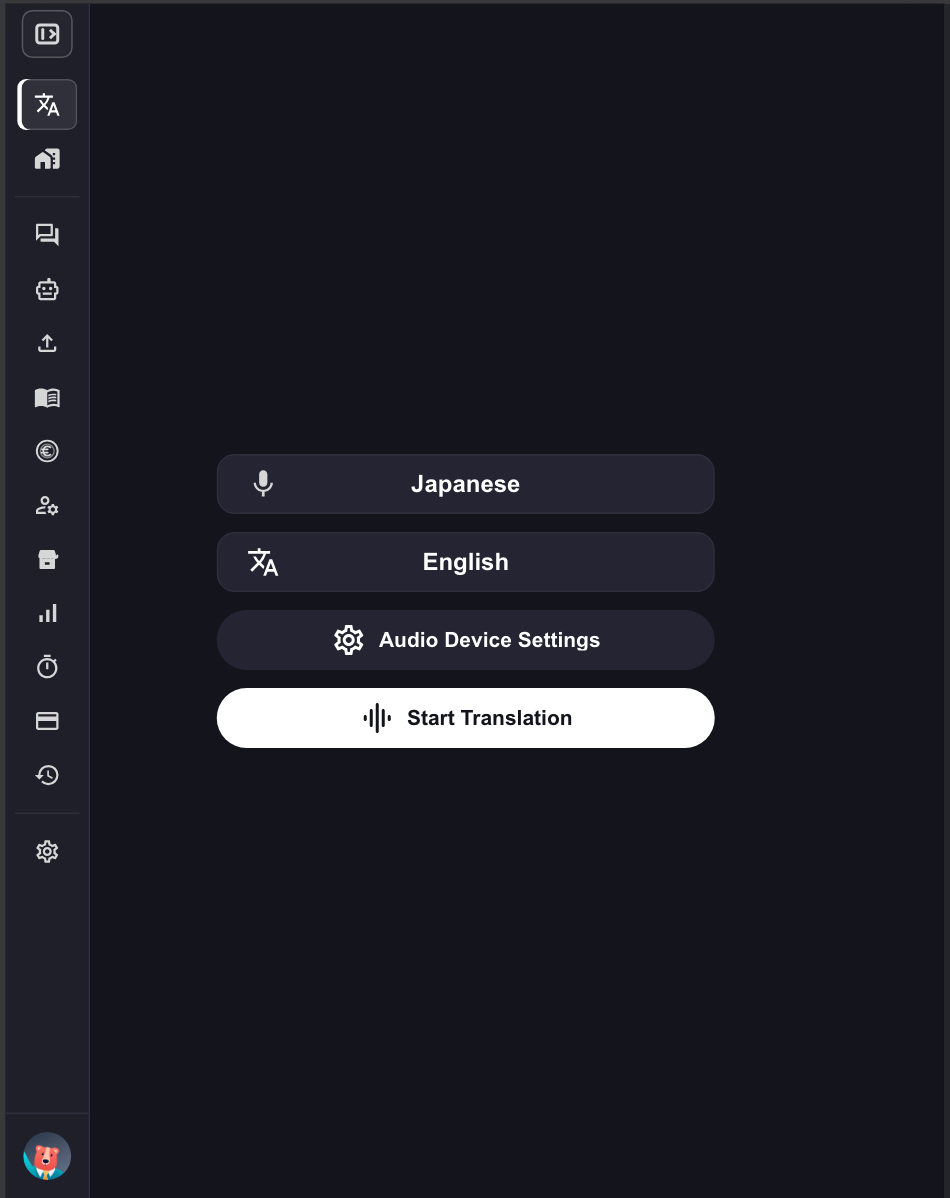
- Specify translation languages.
- Microphone icon: Transcription language (speaker’s language)
- “Text & A” icon: Translation language
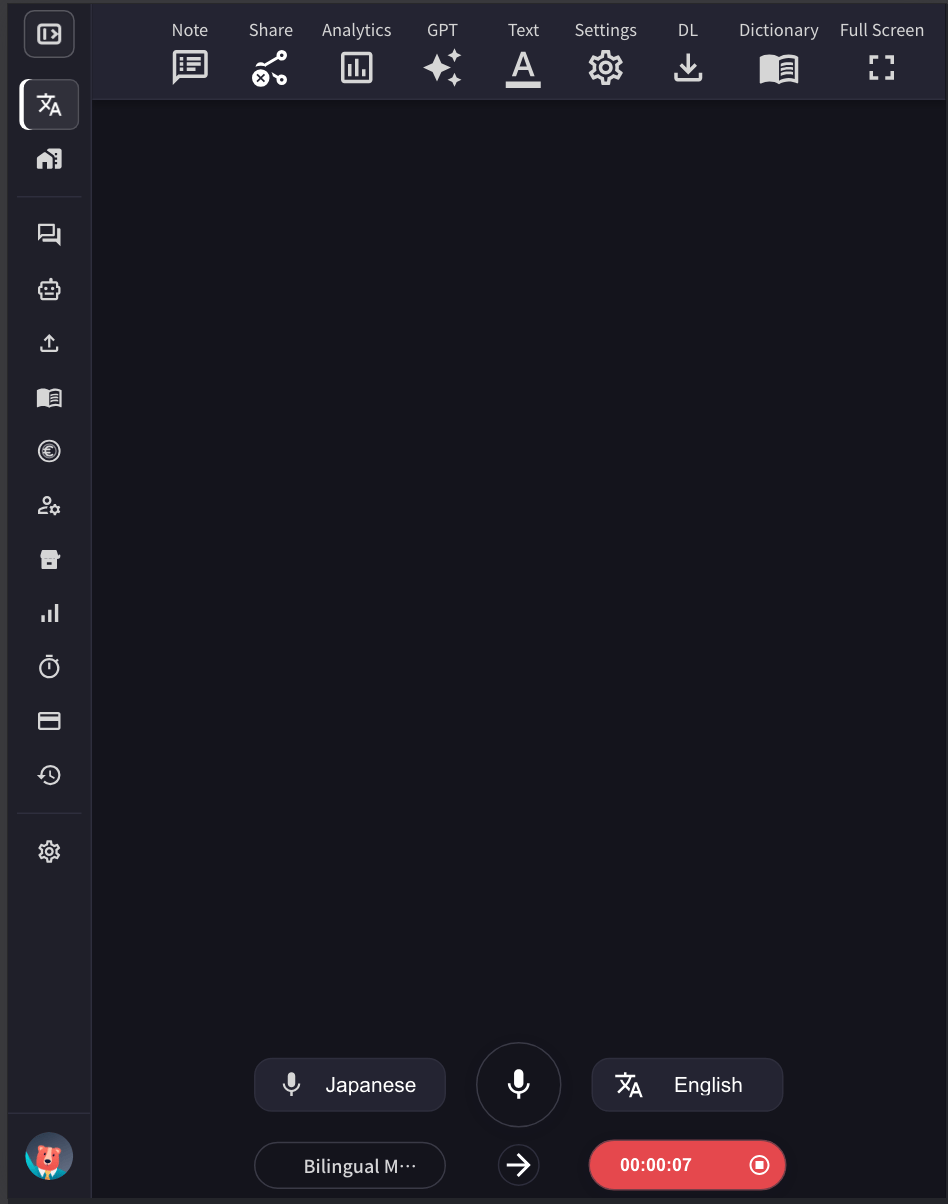
- Adjust the VoicePing translation screen size, text size, and color as needed.
- Press the red recording button (showing the elapsed time) to end translation, then save the content by adding a title and tags to the meeting minutes.
Bilingual Mode
Bilingual Mode allows both parties to speak in their native languages during a conversation. When enabled, the app automatically detects which language is being spoken and translates it into the other language.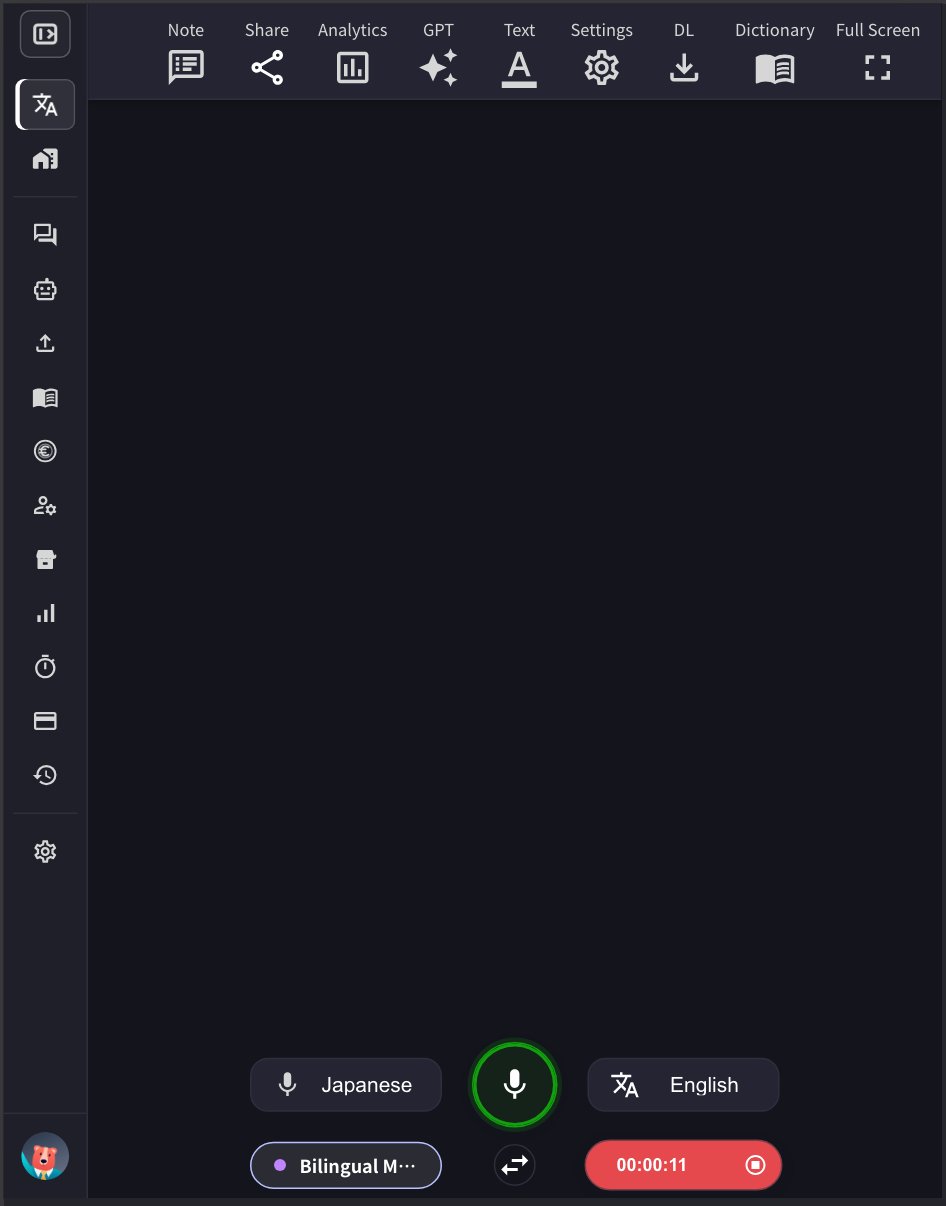
How It Works
- When Bilingual Mode is enabled (indicated by the glowing “Bilingual Mode” button at the bottom left), both selected languages can be spoken
- In the example above, Japanese speech is automatically translated to English, and English speech is automatically translated to Japanese
- The system detects the spoken language and translates it to the other language in real-time
How to Enable/Disable
Click the Bilingual Mode button at the bottom left of the app to toggle it on or off. The button glows purple when enabled.Mobile App
The mobile app works the same way - tap the Bilingual Mode button to enable bidirectional translation.Max Message Duration (s)
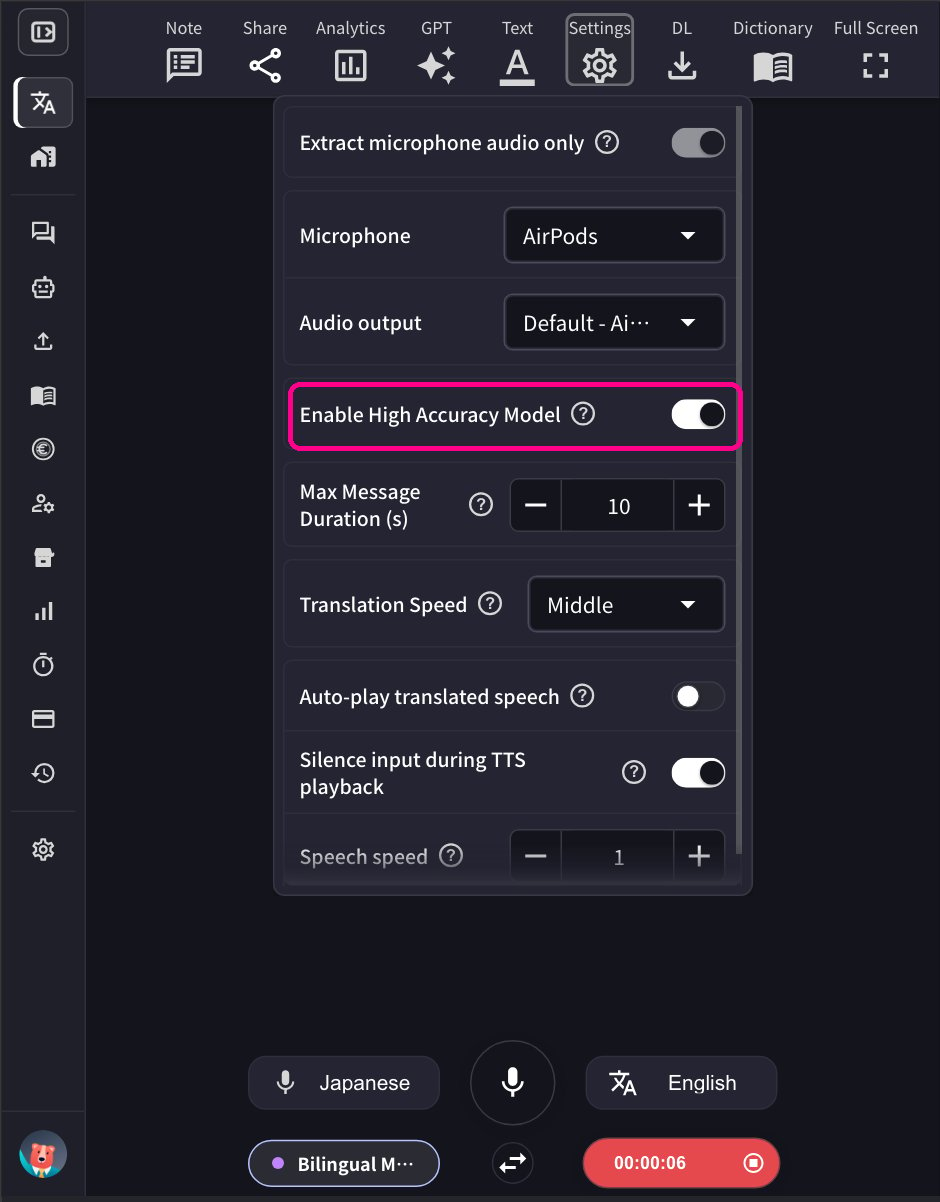
This setting sets the longest a speech segment can run, in seconds, before live transcription finalizes the current message. When the speaker pauses, the message is usually finalized earlier — this value is only the upper limit for one continuous message. It can be set between 5 and 20 seconds, and the default is 10 seconds.- Shorter duration (e.g., 5-8 seconds): Messages are finalized sooner. Especially recommended in Bilingual Mode — the spoken language is detected per message, so shorter messages let the app switch languages faster when speakers alternate and prevent two languages from being mixed into one message.
- Longer duration (e.g., 15-20 seconds): Each message can include more context, which may improve transcription accuracy. Recommended for speeches and presentations where one person speaks continuously in a single language.
Enable High Accuracy Mode
When this mode is enabled, additional post-processing including past sentences is applied to improve speech recognition accuracy. However, this additional processing causes some delay. To enable or disable this feature, go to the Settings gear icon menu → Speech to Text tab → toggle “Enable High Accuracy Model” on or off.- When enabled: Provides more accurate transcription, but increases processing time. Suitable for important meetings or situations where accuracy is critical.
- When disabled: Provides faster response with standard accuracy levels.
How to Share Translation Channel with Guests
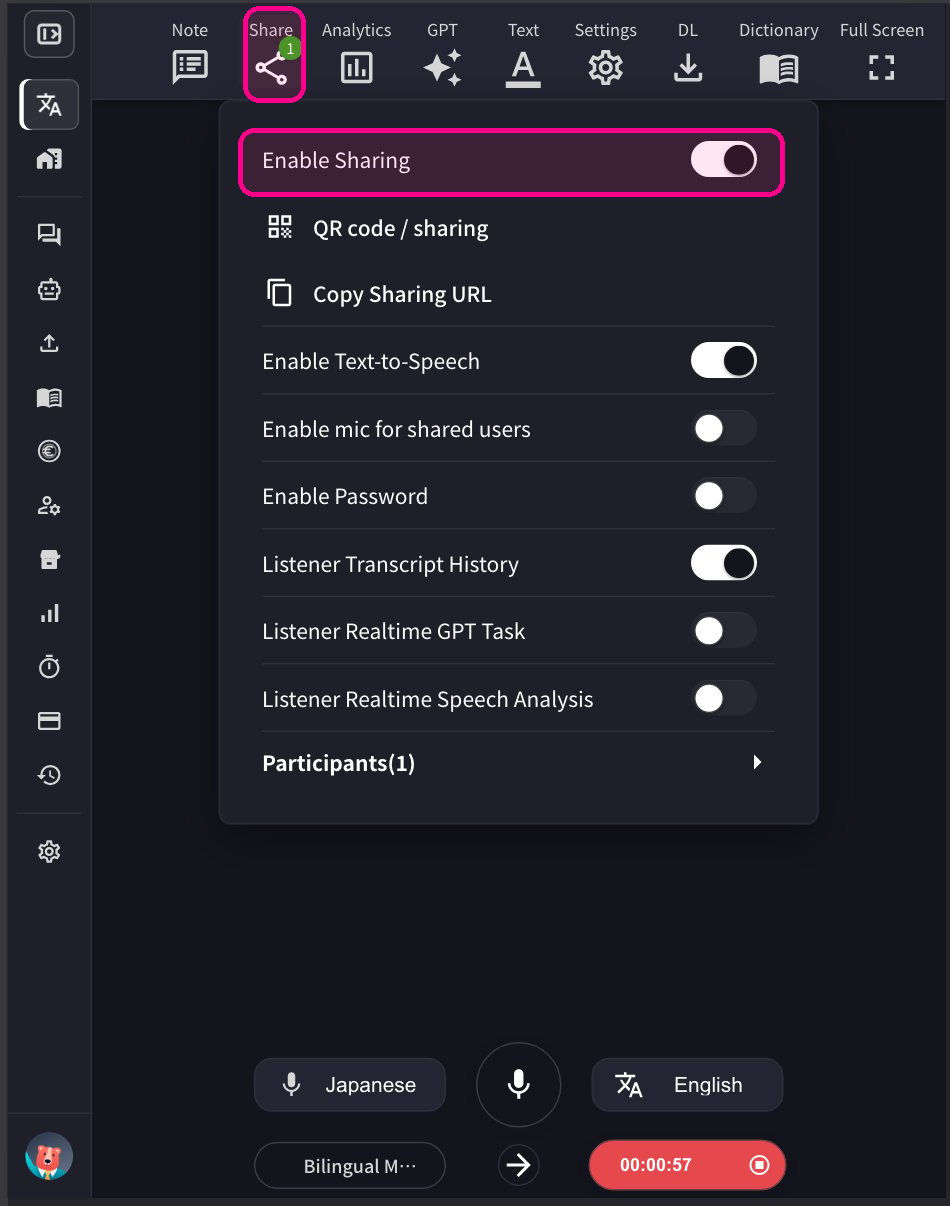
- Click the Share icon at the top and enable sharing.
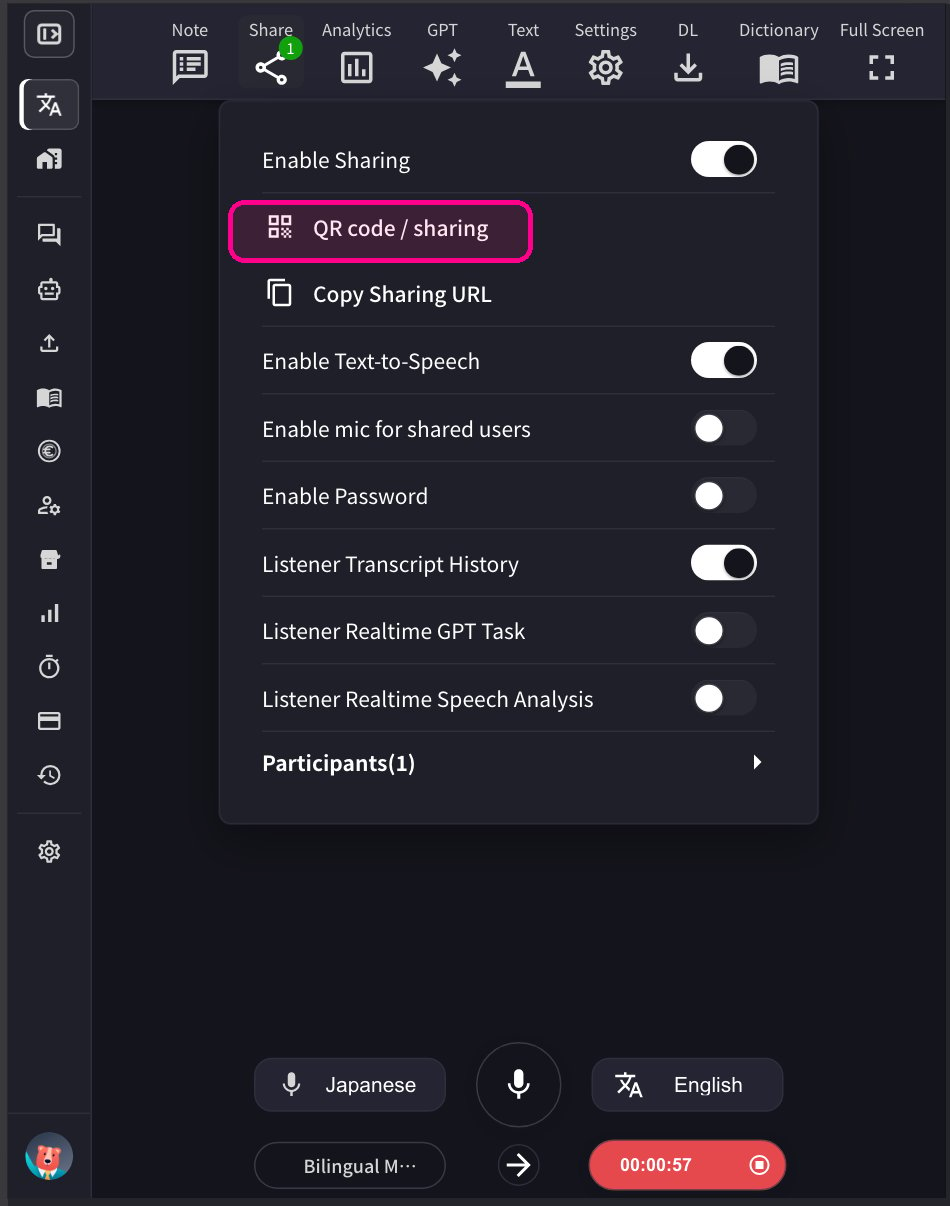
- Share the QR code with guests. This QR code is a static URL for each account and doesn’t change.
- When guests join, their names will appear in the participant list. You can check the number of participants from the “Share” icon. Use “Remove” to remove participants from the channel.
For Guests: How to Join
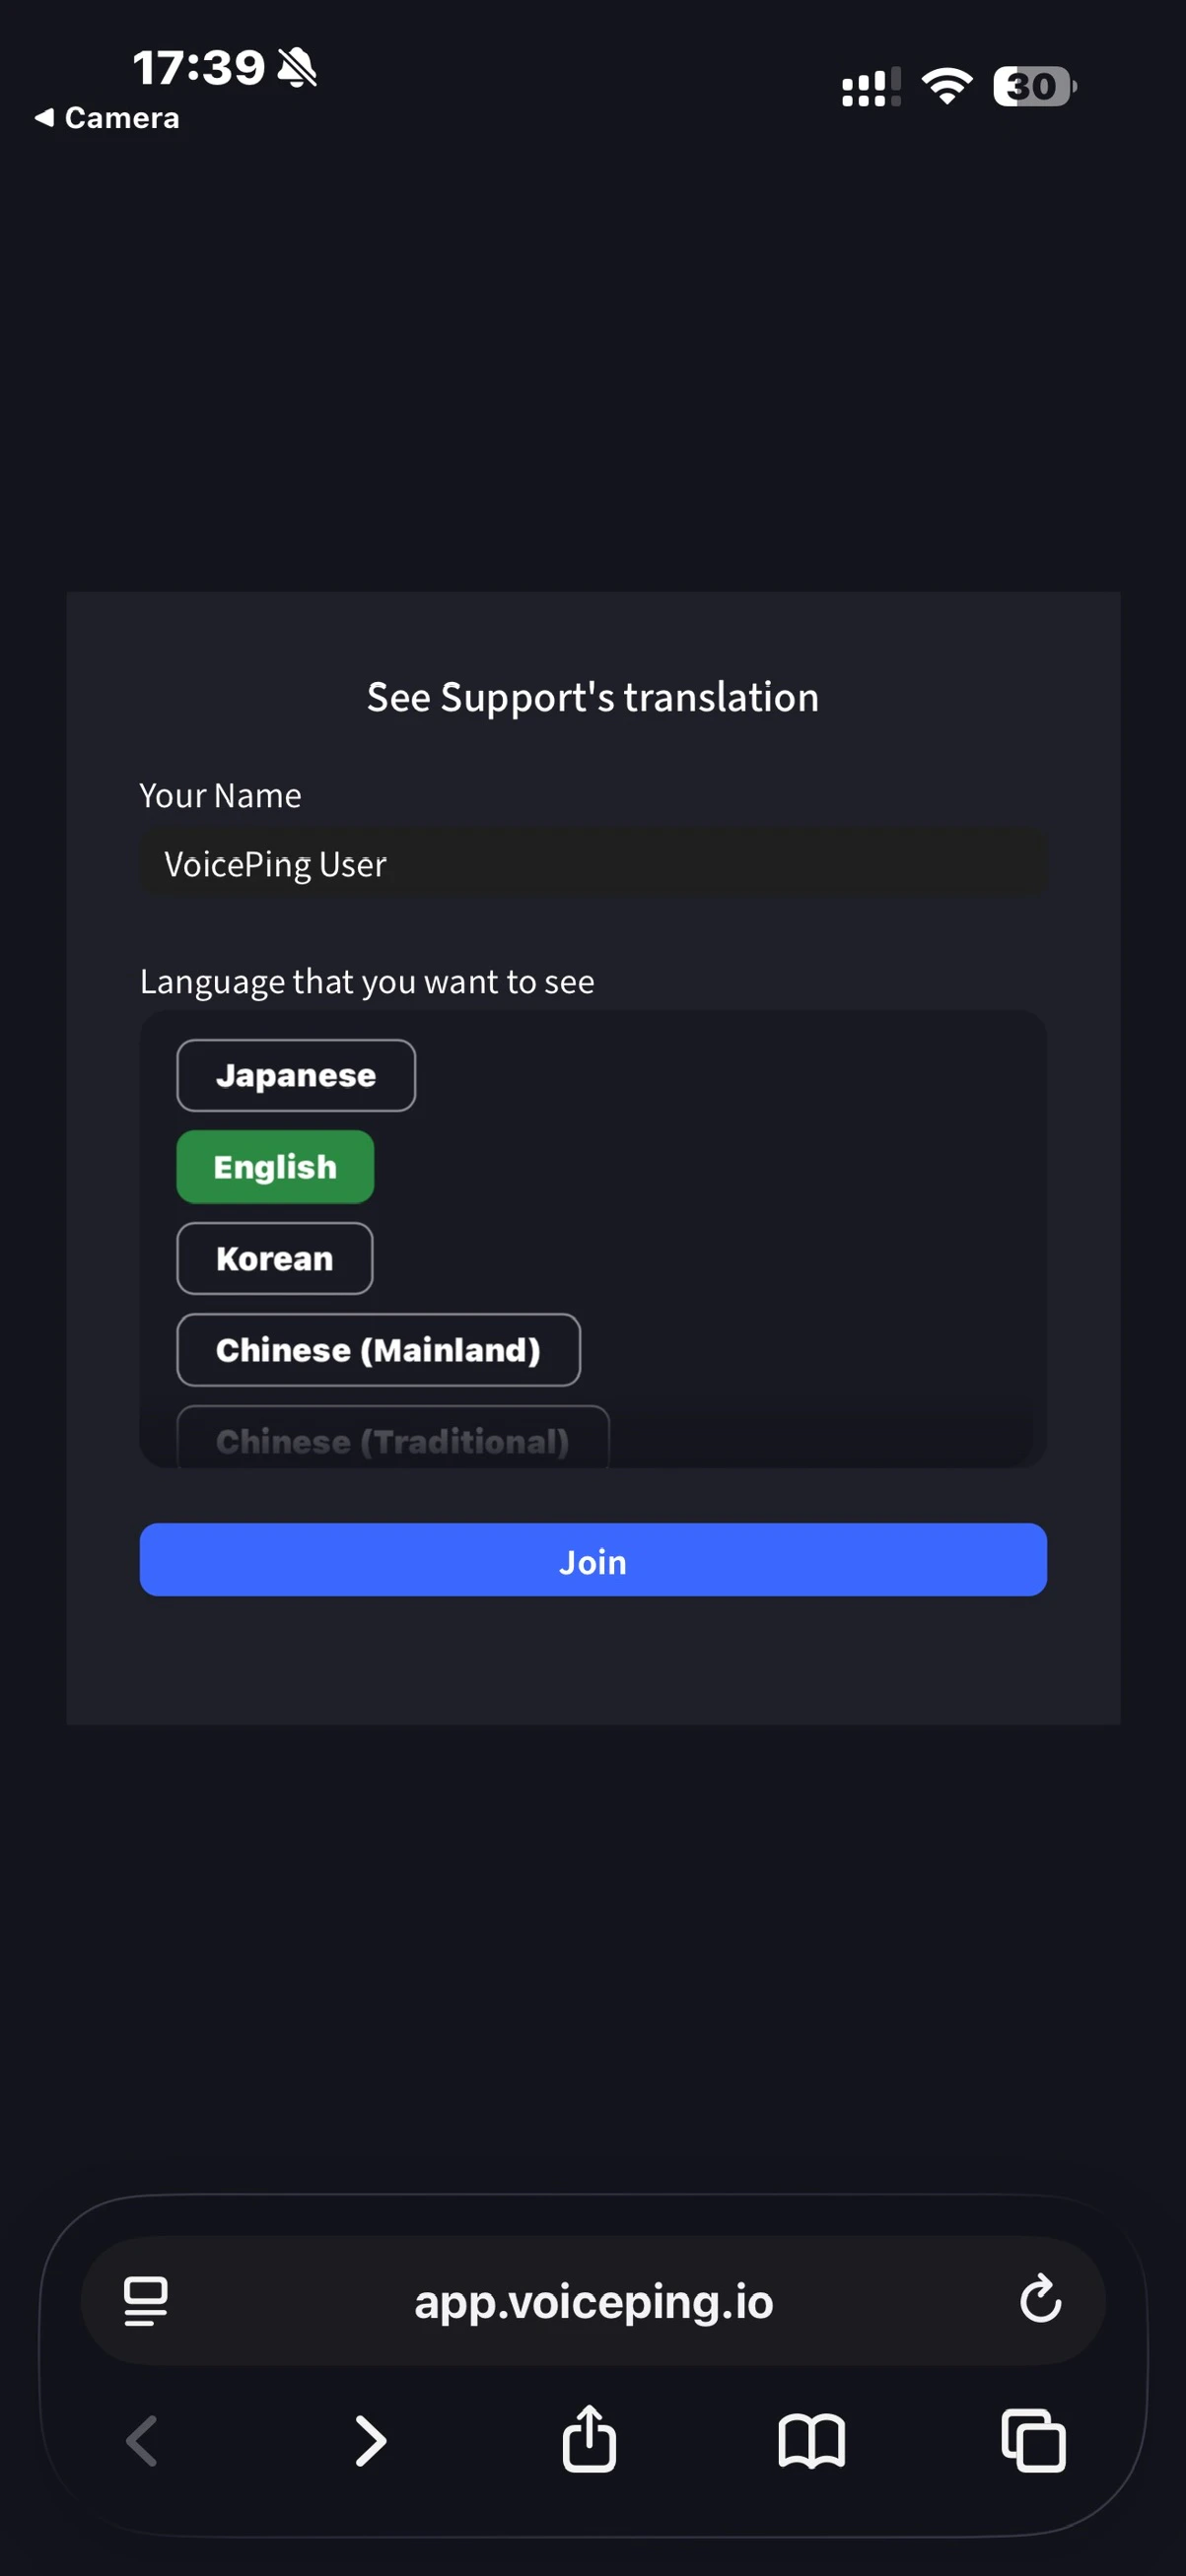
- Scan the QR code or access the URL from a browser.
-
Enter the following:
- Name: Enter your name
- Language you want to view: Select desired translation language
-
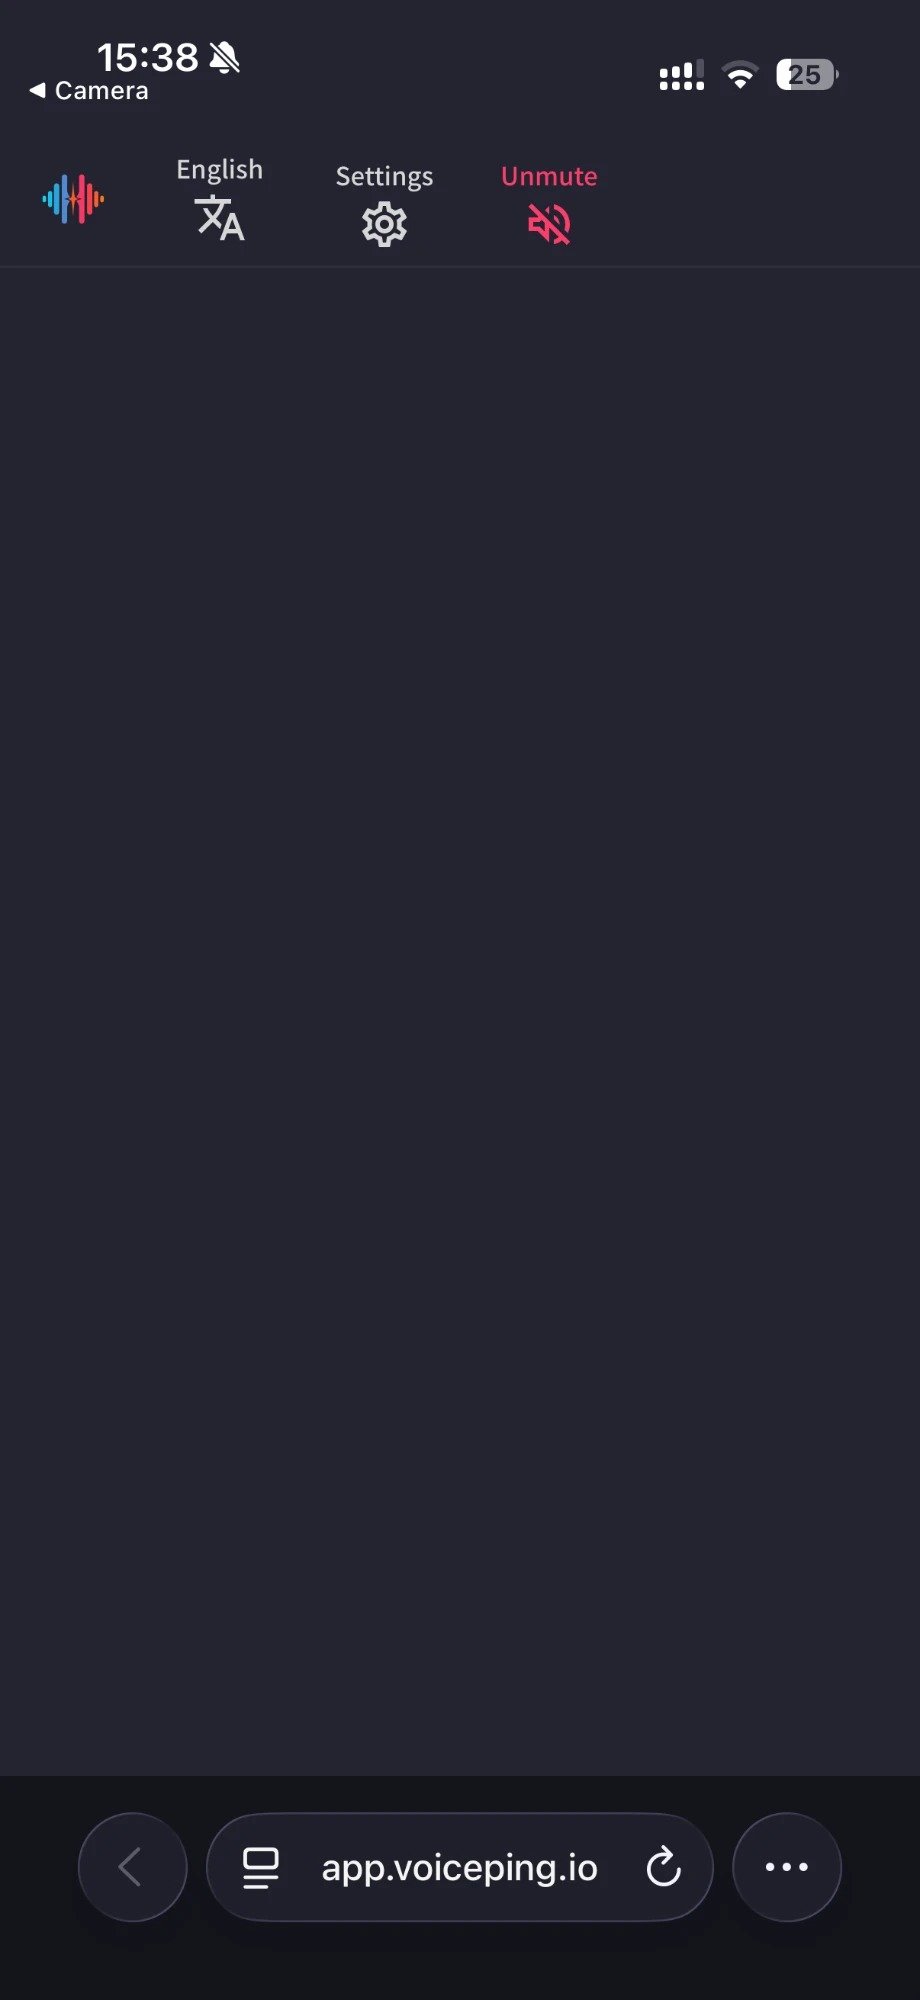
Once joined, the following operations are available:
- Change language
- Adjust translation appearance in “Settings”
- Adjust reading speed
- Turn reading function on/off
- Speak using the microphone (if enabled by the host)
- Leave
Official Links
Official Website
Visit our official website
X (Twitter)
Follow us on X
Like us on Facebook
Connect on LinkedIn